Pencil Pot Crochet Pattern
I love to crochet and to make useful things, and I remember learning how to make 3D shapes in crochet and finding this so amazing! Knowing this opened my eyes to all the many things that I could crochet!
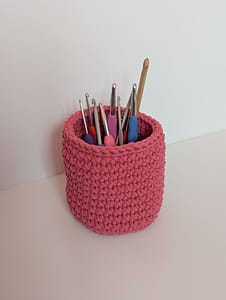
I spend a lot of time at my desk, and I often have things floating around, and frequently need to have a bit of a tidy up, so what better than to crochet something that can help! Introducing my simple and easy crochet pencil pot holder!

I’ve called it a pencil pot as that is what it reminds me of, but the fantastic thing is, that this can be altered to any diameter and any height! Although in the picture above, I’ve put pens and pencils in, the reality is that I would use this most to store my crochet hooks, as this is often what I have lying about in my office!
As I said above though, the fantastic thing about this super simple pattern, is that it easily be altered to be wider or thinner, or shorter or taller. It is also really quick and easy to make, so it’s a quick satisfying project! Are you sold and want to give it a try? Let’s go!
The Pattern
What you’ll need:
- 1 x 100g ball of 3mm cord – I’ve used a 3mm macrame cord, as I find it super sturdy and it holds its shape well, however macrame cord can be quite hard on the hands when crocheting, so any sturdy and durable yarn / cord will work
- 5.5mm crochet hook (or any crochet hook that will work with the yarn you are using)
- Stitch marker
- Scissors
- Yarn needle
I’ll write the pattern out in US terms first and then in UK terms, with helpful photographs at the end to help guide you through the whole pattern – enjoy!
US terms
Abbreviations
- blo = back loop only
- ch = chain
- M = stitch marker
- sc = single crochet
- rep = repeat
- sl st = slip stitch
- st(s) = stitch(es)
Written Pattern
Make a magic ring. If you need a reminder you can find my Magic Ring tutorial HERE.
Round 1: 1ch (does not count as a st), 6sc in ring, sl st in first sc to join. (6 sts)
Round 2: 1ch, 2sc in each st around, place M in first st to mark beginning of round. (12 sts)
Do not join the round, from now on work in continuous rounds, move the stitch marker up each round to mark the beginning of the round as you work, remember not to work into the slip stitch or the chain from round 2 when starting round 3
Round 3: *1sc, 2sc in next st; rep from * to end of round. (18 sts)
Round 4: *2sc, 2sc in next st; rep from * to end of round. (24 sts)
Round 5: *3sc, 2sc in next st; rep from * to end of round. (30 sts)
Round 6: *4sc, 2sc in next st; rep from * to end of round. (36 sts)
Round 7: 1sc blo in each st around.
Round 8: 1sc in each st around.
Rounds 9 to 17: Rep round 8.
Round 18: 1sl st in each st around.
Cut yarn fasten off and weave in with a invisible join. Enjoy!
NOTE: To make the pot wider, make more increasing rounds after round 6, and increase by 6 stitches each round. To make the pot thinner, work less increasing rounds.
NOTE: To make the pot taller, work more straight rounds after the back loop only round. To make the pot shorter, work less straight rounds.
UK terms
Abbreviations
- blo = back loop only
- ch = chain
- dc = double crochet
- M = stitch marker
- rep = repeat
- sl st = slip stitch
- st(s) = stitch(es)
Written Pattern
Make a magic ring. If you need a reminder you can find my Magic Ring tutorial HERE.
Round 1: 1ch (does not count as a st), 6dc in ring, sl st in first dc to join. (6 sts)
Round 2: 1ch, 2dc in each st around, place M in first st to mark beginning of round. (12 sts)
Do not join the round, from now on work in continuous rounds, move the stitch marker up each round to mark the beginning of the round as you work, remember not to work into the slip stitch or the chain from round 2 when starting round 3
Round 3: *1dc, 2dc in next st; rep from * to end of round. (18 sts)
Round 4: *2dc, 2dc in next st; rep from * to end of round. (24 sts)
Round 5: *3dc, 2dc in next st; rep from * to end of round. (30 sts)
Round 6: *4dc, 2dc in next st; rep from * to end of round. (36 sts)
Round 7: 1dc blo in each st around.
Round 8: 1dc in each st around.
Rounds 9 to 17: Rep round 8.
Round 18: 1sl st in each st around.
Cut yarn fasten off and weave in with a invisible join. Enjoy!
NOTE: To make the pot wider, make more increasing rounds after round 6, increase by 6 stitches each round. To make the pot thinner, work less increasing rounds.
NOTE: To make the pot taller, work more straight rounds after the back loop only round. To make the pot shorter, work less straight rounds.
Step by Step Pattern
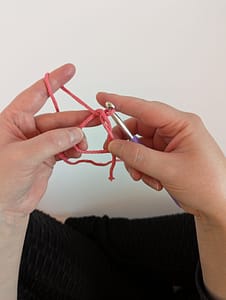
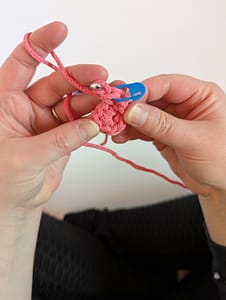
- Start by making a magic ring – you can find my tutorial here!
2. Make one chain stitch (this does not count as a stitch), then make six single crochet stitches into the ring (double crochet stitches in UK terms).
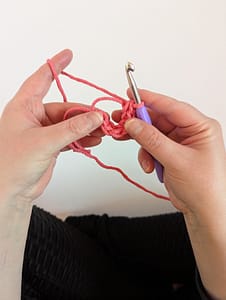
3. Join the round with a slip stitch into the first stitch, and pull to close the magic ring.
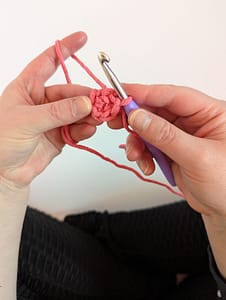
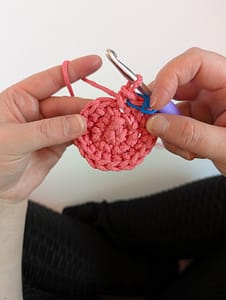
4. From now on work in continuous rounds, make one chain (again this does not count as a stitch), make the first single crochet stitch into the first stitch and place a stitch marker in the stitch you just made.
5. Now make two single crochet stitches into each stitch around, so you will now have 12 stitches.

6. We are not going to join this round, we are just going to continue, so, miss the slip stitch from the round below and miss the chain stitch from the beginning of the round and work the first stitch for round 3 into the first single crochet stitch (the stitch you marked with the stitch marker).
7. Then place a stitch marker in that stitch.
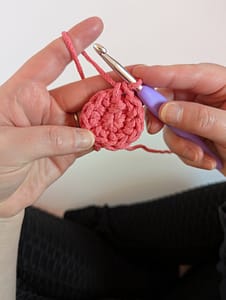
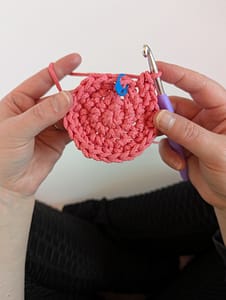
8. Keep working in continuous rounds, increasing each round by six stitches. Round 3 is worked by making one single crochet stitch, then two single crochet stitches into the next stitch, and repeating this six times across the whole round, so you will now have 18 stitches in total.
9. Again work the first stitch for round 4 into the stitch you marked at the beginning of round 3.
10. Continue to increase the stitch count by six stitches again for round 4. This round is worked by making two single crochet stitches and then 2 single crochet stitches into the next stitch to increase the stitch count to 24.
11. If you wanted a thinner pot, you could stop here and move onto Round 7, but otherwise continue for two more rounds, again increasing the stitch count by 6 stitches each time. At the end of Round 6 you will have 36 stitches.
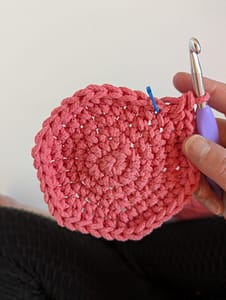
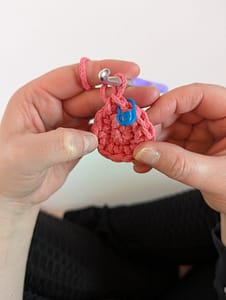
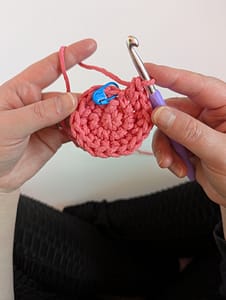
12. Now we are going to do some magic! Round 7 is worked into the back loops only, and we are going to keep the stitch count the same. So work a single crochet stitch in the back loop only in each stitch around. This creates a nice little ridge and helps with the turn of the pot.
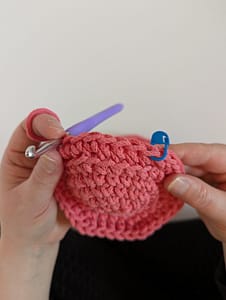
13. As we are working in continuous rounds, you will find that at the end of this round your last stitch will be above the first stitch, but don’t worry, once the pot is upright you won’t really notice this.
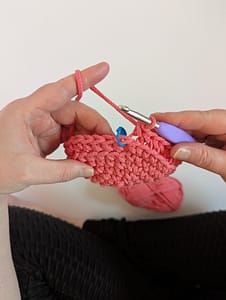
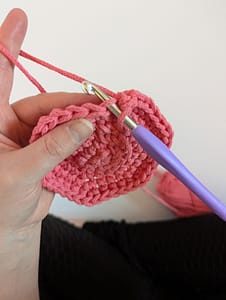
14. Next work the sides of the pot. This is created by just continually working single crochet stitches around and around. The important thing to remember is to move your stitch marker up, placing it in the first stitch so you can keep track of how many rounds you have worked and make sure you have the correct number of stitches. I worked up to round 17 for my pot, but you can make it shorter or taller by working more or less rounds at this point.
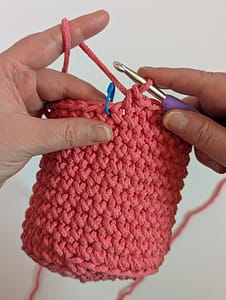
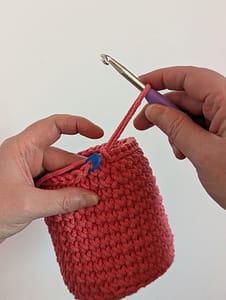
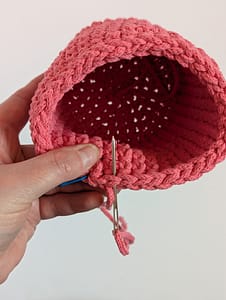
15. To finish the pot, work one single round in slip stitches. Work one slip stitch into each stitch around. This gives the pot a nice finish. Cut the yarn ready to make the invisible join.
16. Pull the last loop to finish the stitch.
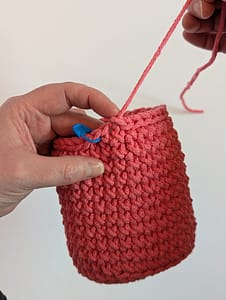
17. Thread the yarn tail onto a large eye tapestry needle.
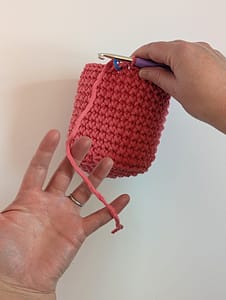
18. Now, thread the yarn under both loops of the next stitch (the stitch with the stitch marker), from the inside to the outside of the pot.
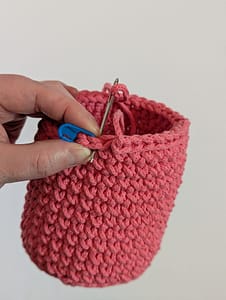
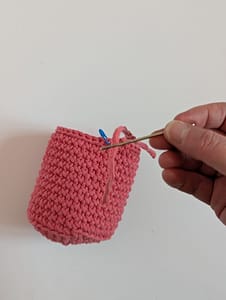
19. Then thread the yarn through the back loop only of the previous stitch.
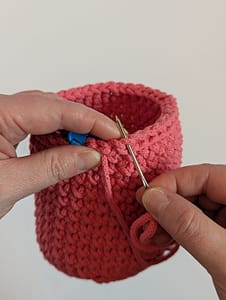
20. Pull it through and weave in the yarn end as usual and cut flush to the pot.
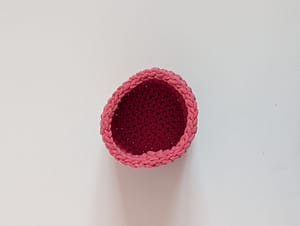
21. Place the items you want to store in the pot and enjoy!
I hope you enjoy this pattern and find it helpful! This is such a quick and easy project, and really very satisfying!