Have you seen those super cute amigurumi crochet toys, or even a beautiful crochet coaster which is a perfect circle and wonder how the start is made? Well, to make it look like there is no beginning hole, we use a fantastic technique in crochet called the Magic Ring (or Magic Circle – they’re both the same, used interchangeably)
It may seem a little tricky at first, but stick with it – it will get easier!
Also, I’ve seen a few slightly different ways crocheters make the magic ring, but this is the technique I learnt and this is how I make them…
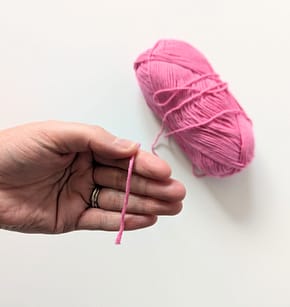
To start you will need the yarn you are going to use and the appropriate size hook for the yarn and your pattern
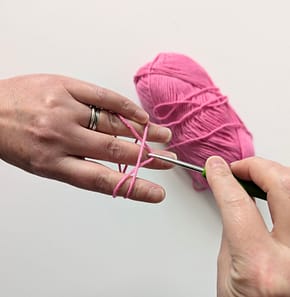
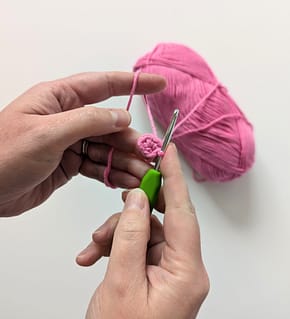
- With your fingers held straight and together place the yarn end over your fingers
2. Wrap the yarn around fully around your fingers so that it crosses at the front….
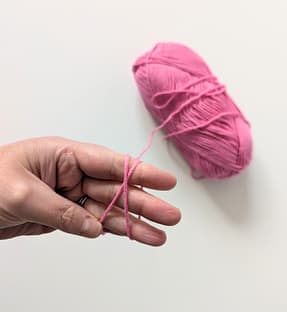
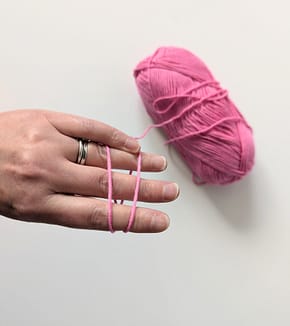
3. And you have two parallel lines of yarn on the back of your fingers
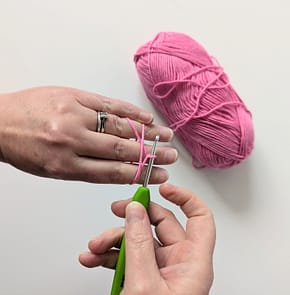
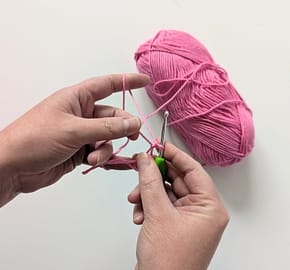
4. Next take your crochet hook and insert it under the first parallel line and then grab the second parallel line with your hook
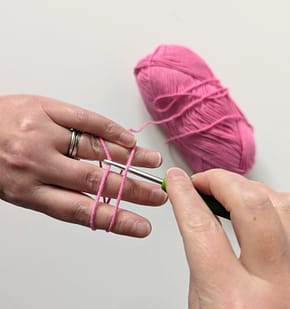
5. Pull the yarn underneath the first parallel line
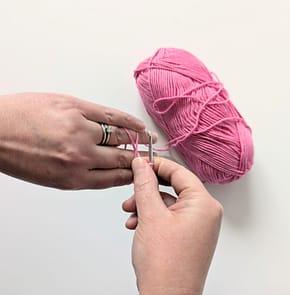
6. And then twist your hook to form a loop, i.e. so your hook goes from horizontal to vertical as per the picture below:
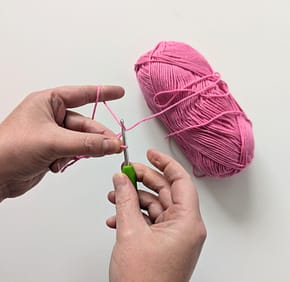
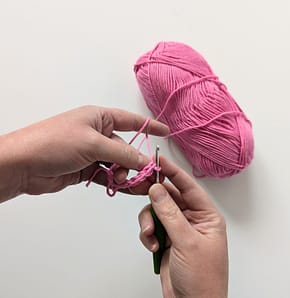
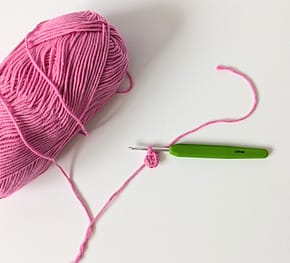
7. This next part can be a bit fiddly, I find the trick is to make sure you are holding the loop on your hook and the magic loop altogether – I hold it between my finger and thumb (as in the picture) and slide the loop off your fingers
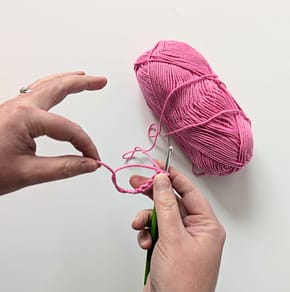
8. Now make the required number of starting chain that your pattern states (if any!) here, I am going to make some single crochet stitches (double crochet stitches in UK terms), so I will make one chain
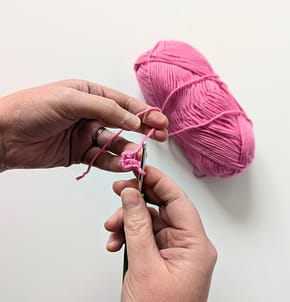
9. Next we are going to work the first round, and these stitches are worked into the big loop you just made – shown between my two thumbs in the photograph below (the magic ring!)
10. Now make as many stitches as your pattern states into that loop. Here I have made six single crochet stitches (double crochet stitches in UK terms) into the magic ring. If you want to know how to make a single crochet stitch (double crochet stitch in UK terms) follow my blog post tutorial HERE.
11. Now for my favourite part!! The magic! Take the yarn end from the magic loop, and pull the end tight! I find it helps to hold the stitches as you pull the yarn end
12. This should then pull all the stitches tightly together, and there should be no gap in the middle
13. I am going to join my round with a slip stitch in the first stitch, but in some patterns you just keep on going around and you don’t need to join
14. And now you continue working around all the stitches as to what your pattern states. Ta dah! Well done – magic ring complete!
I hope that has been helpful! Let me know how you get on with your crochet projects! I’d love to know!
If you want my Free PDF beginners guide to crochet to learn how to make those first few stitches, just hop onto my mailing list and get your free copy HERE.