The weather is turning and it is absolutely feeling more autumnal! But as the weather turns cooler, this means more excuses to do more yarn crafts!
I love the colours of autumn, the yellows, oranges, red and browns are so warm, cosy and comforting!
And, of course, I start to think about Halloween and all the associated fun things! I’ve seen loads of pumpkins around this year, real and crafty ones! So I thought I’d have a go a crocheting my own pumpkin and it came out super cute!!
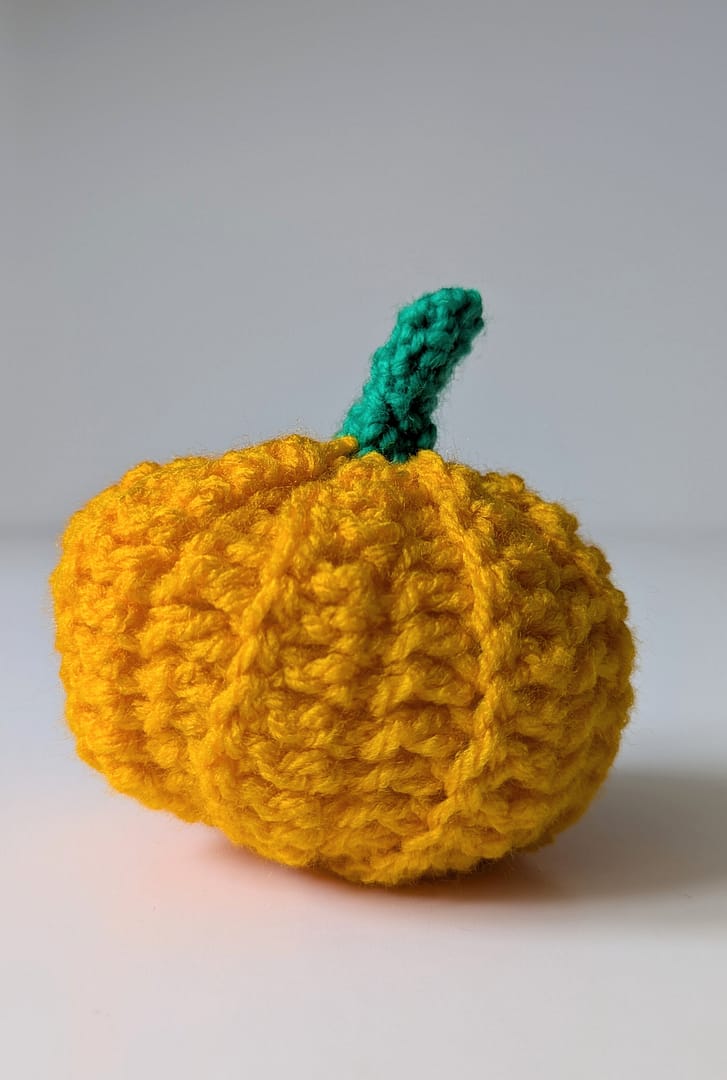
I wanted to keep it really simple and straightforward, so the main body of the pumpkin is all in one stitch and the stalk is super easy as well!
Won’t don’t you give it a try!
I’ve written the pattern out first in UK terms and then US terms, but don’t worry I explain the pattern in more detail after with photographs to help so keep on reading!
This pattern uses stitches worked into the back loops only, if you need a reminder as to how to work into the back loop only, have a look a my tutorial here!
Super Simple Pumpkin Pattern
You will need:
- Orange DK weight yarn and a small amount of Green DK weight yarn
- 4mm crochet hook
- Toy stuffing
- Yarn needle
- scissors
UK terms
Abbreviations:
- blo = back loop only
- ch = chain
- dc = double crochet
- sl st = slip stitch
- st(s) = stitch(es)
- tr = treble crochet
PATTERN
Using Orange yarn
Foundation chain: Make 15ch
Row 1: 2ch (does not count as a st), 1tr in each ch to end, turn. (15 sts)
Row 2: 2ch, 15tr blo, turn.
Repeat Row 2 until work measures 20cm or to desired length.
Cut yarn and fasten off, leaving a 30cm yarn tail for sewing.
Fold fabric and line up the Foundation chain and the last row, thread the yarn tail onto the yarn needle, and sew the two rows together.
Turn the piece 90 degrees and thread yarn through all the row ends, pull yarn tightly to join the long side together, fasten off and trim yarn end.
Fill pumpkin body with toy stuffing.
With a new thread of orange yarn, sew together the other row ends to close the pumpkin, fasten off and cut yarn.
STALK
Using Green yarn, make a magic ring
Round 1: 1ch, make 4dc in ring, pull ring tight to close and sl st in first dc to join. (4 sts)
Rounds 2 to 5: 4dc (work in a continuous spiral).
Round 6: 2dc in each st around. (8 sts)
Cut yarn and fasten off.
Sew stalk onto the top of the pumpkin, weave in any yarn ends, and enjoy!!
US terms
Abbreviations:
- blo = back loop only
- ch = chain
- dc = double crochet
- sc = single crochet
- sl st = slip stitch
- st(s) = stitch(es)
PATTERN
Using Orange yarn,
Foundation chain: Make 15ch
Row 1: 2ch (does not count as a st), 1dc in each ch to end, turn. (15 sts)
Row 2: 2ch, 15dc blo, turn.
Repeat Row 2 until work measures 20cm or to desired length.
Cut yarn and fasten off, leaving a 30cm yarn tail for sewing
Fold fabric and line up the Foundation chain and the last row, thread the yarn tail onto the yarn needle, and sew the two rows together.
Turn the piece 90 degrees and thread yarn through all the row ends, pull yarn tightly to join the long side together, fasten off and trim yarn end.
Fill pumkin body with toy stuffing.
With a new thread of orange yarn, sew together the other row ends to close the pumpkin, fasten off and cut yarn.
STALK
Using Green yarn, make a magic ring
Round 1: 1ch, make 4sc in ring, pull ring tight to close and sl st in first sc to join. (4 sts)
Rounds 2 to 5: 4sc (work in a continuous spiral).
Round 6: 2sc in each st around. (8 sts)
Cut yarn and fasten off.
Sew stalk onto top of pumkin, weave in any yarn ends, and enjoy!!
Step by Step instructions:
- Start with your 4mm hook and orange yarn, we want 15 stitches for the main body of the pumpkin, so we’ll start with 15 chain stitches (you can alter this number if you want a larger or smaller pumpkin. Using 15 stitches created the body of the pumpkin which is approximately 8cm tall).
- The first row is made with standard Treble (UK terms) / Double (US terms) crochet stitches. Start by making two chain stitches, which act as turning chains (they give you the height you need to start the row, they do not act as a stitch), and make one Treble (UK) / Double (US) stitch in each of the 15 chain stitches, so you have 15 stitches in total.
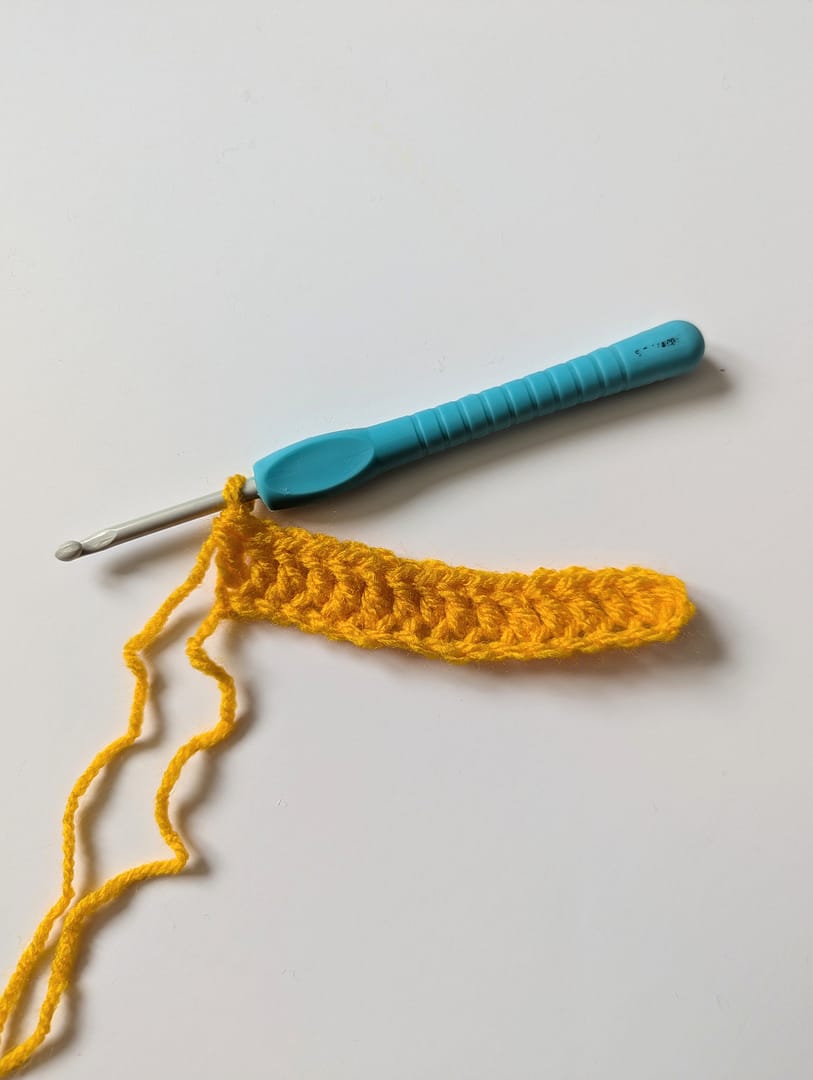
3. The next row is worked into the back loop only. Make two chain stitches (again they do not count as a stitch). Then make one Treble (UK) / Double (US) crochet stitch into the back loop only of each stitch across. So you now have 15 stitches worked into the back loop.
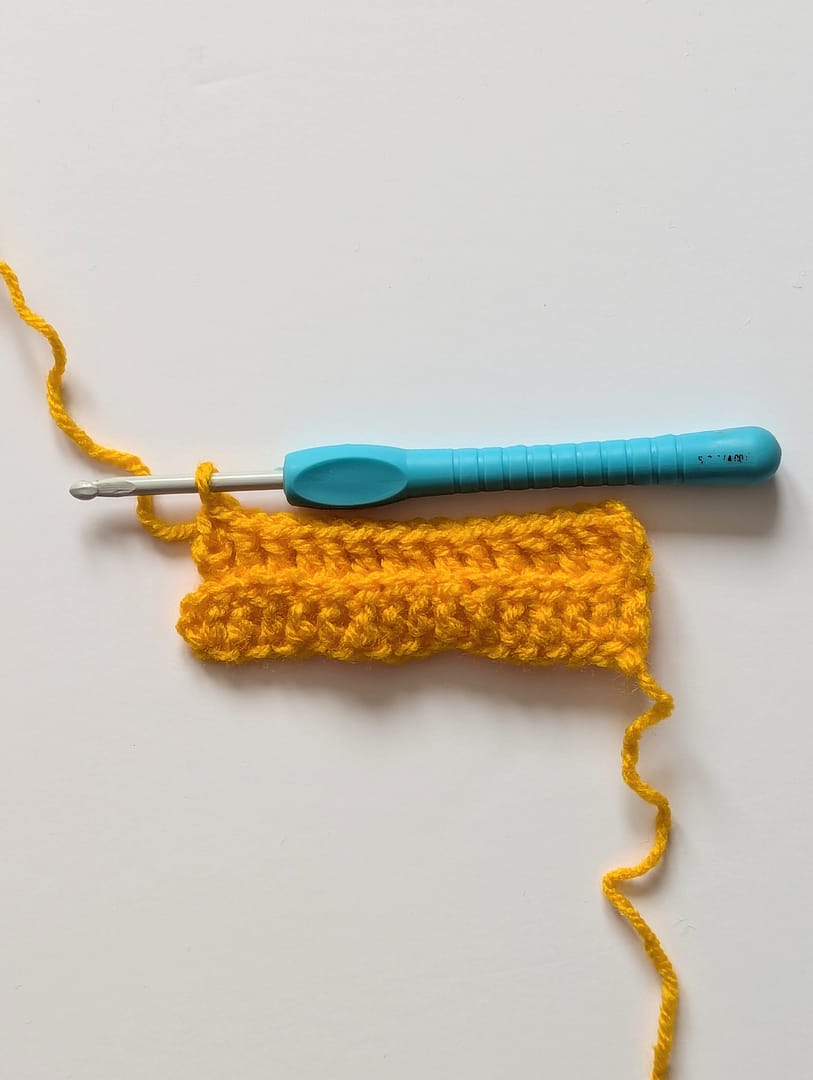
4. Continue to repeat the last row, always working into the back loop only, and continue until your piece measures approximately 20cm long.
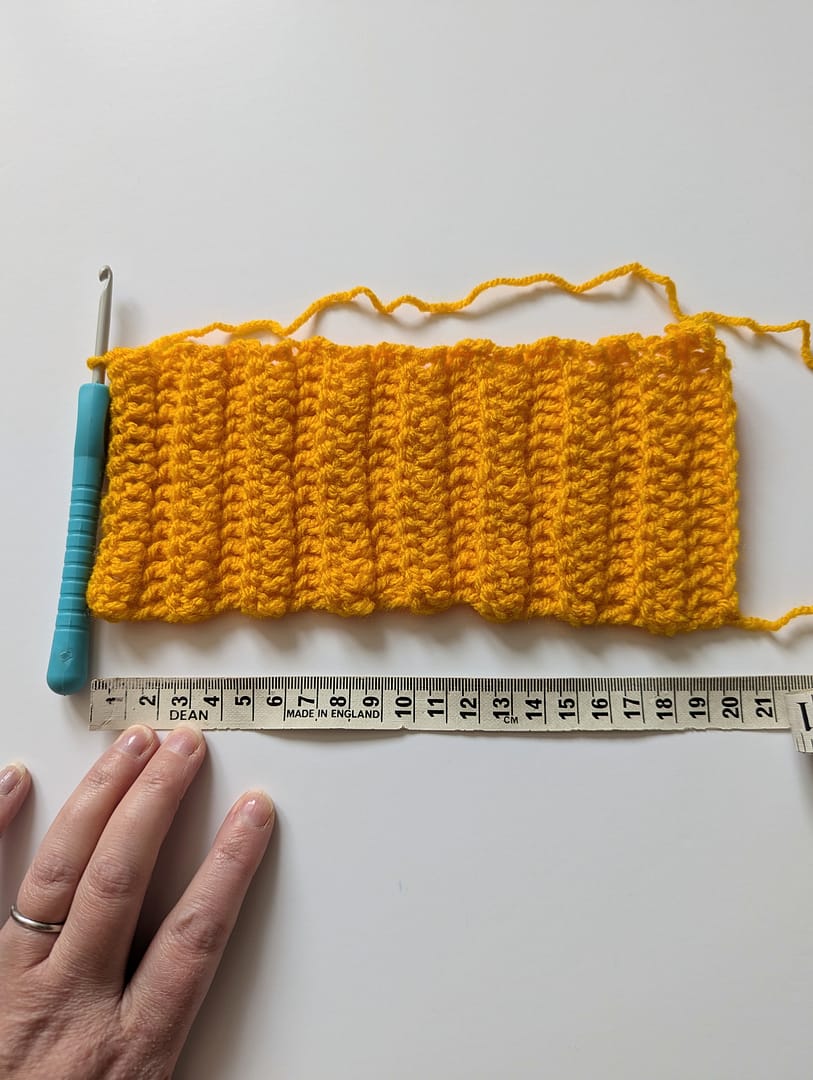
5. Cut yarn leaving a tail approximately 30cm long to use for sewing, and fasten off – (pull the last loop until the tail end has threaded through the loop).
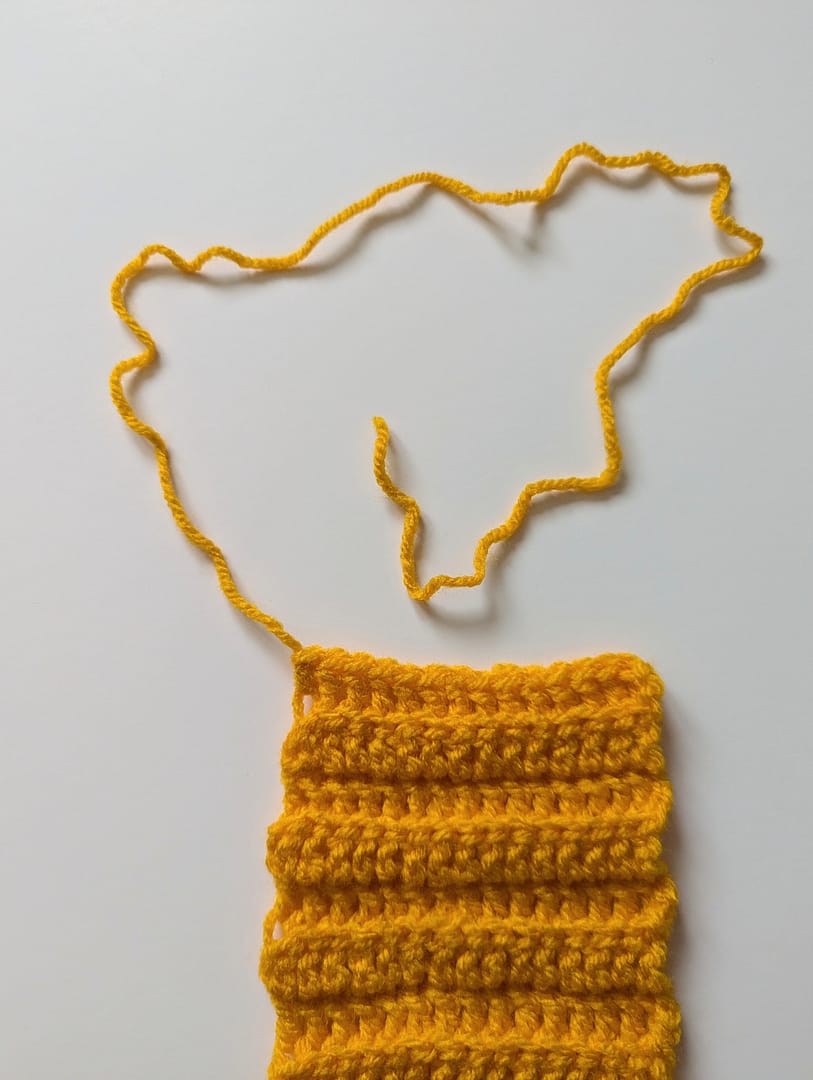
6. Next line up the foundation chains (the first chain stitches made), with the last row worked. Thread the yarn tail onto the yarn needle (a blunt needle with a large eye), and sew the two short ends together, thread the needle through one of the foundation chains and then through the back loop of the correlating stitch in the last row, and repeat across the whole side.
7. It should look something like this:
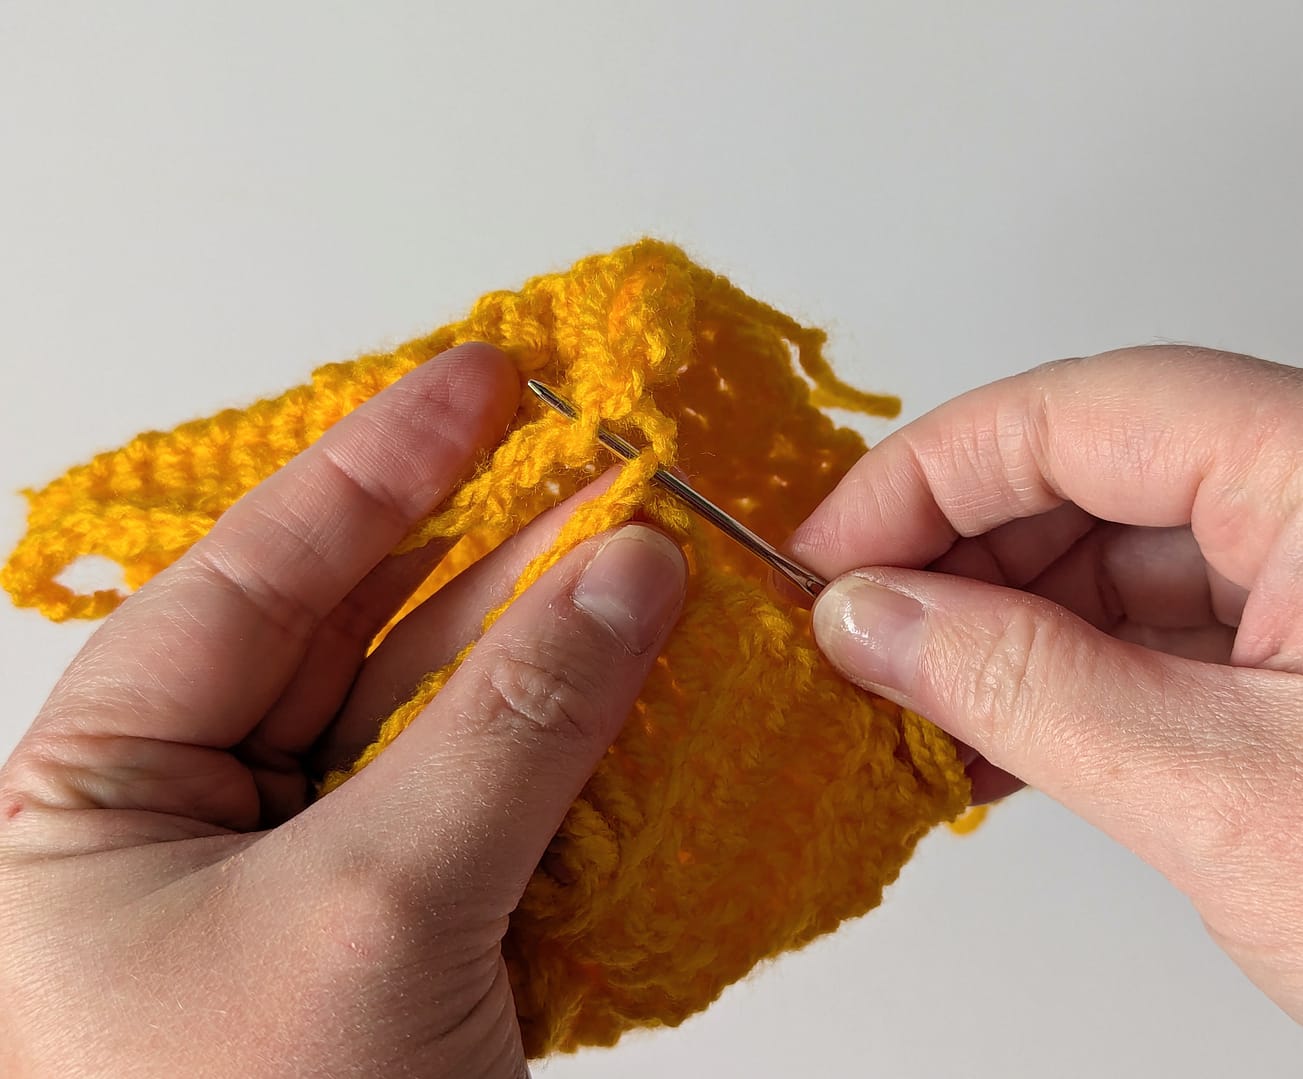
8. Now turn the piece 90 degrees so that the end you have just finished on is at the top. Now thread the needle through all the row ends around the whole circumference.

9. Once you have threaded the yarn through all the row ends on the long edge, pull the yarn tight to close that side together.
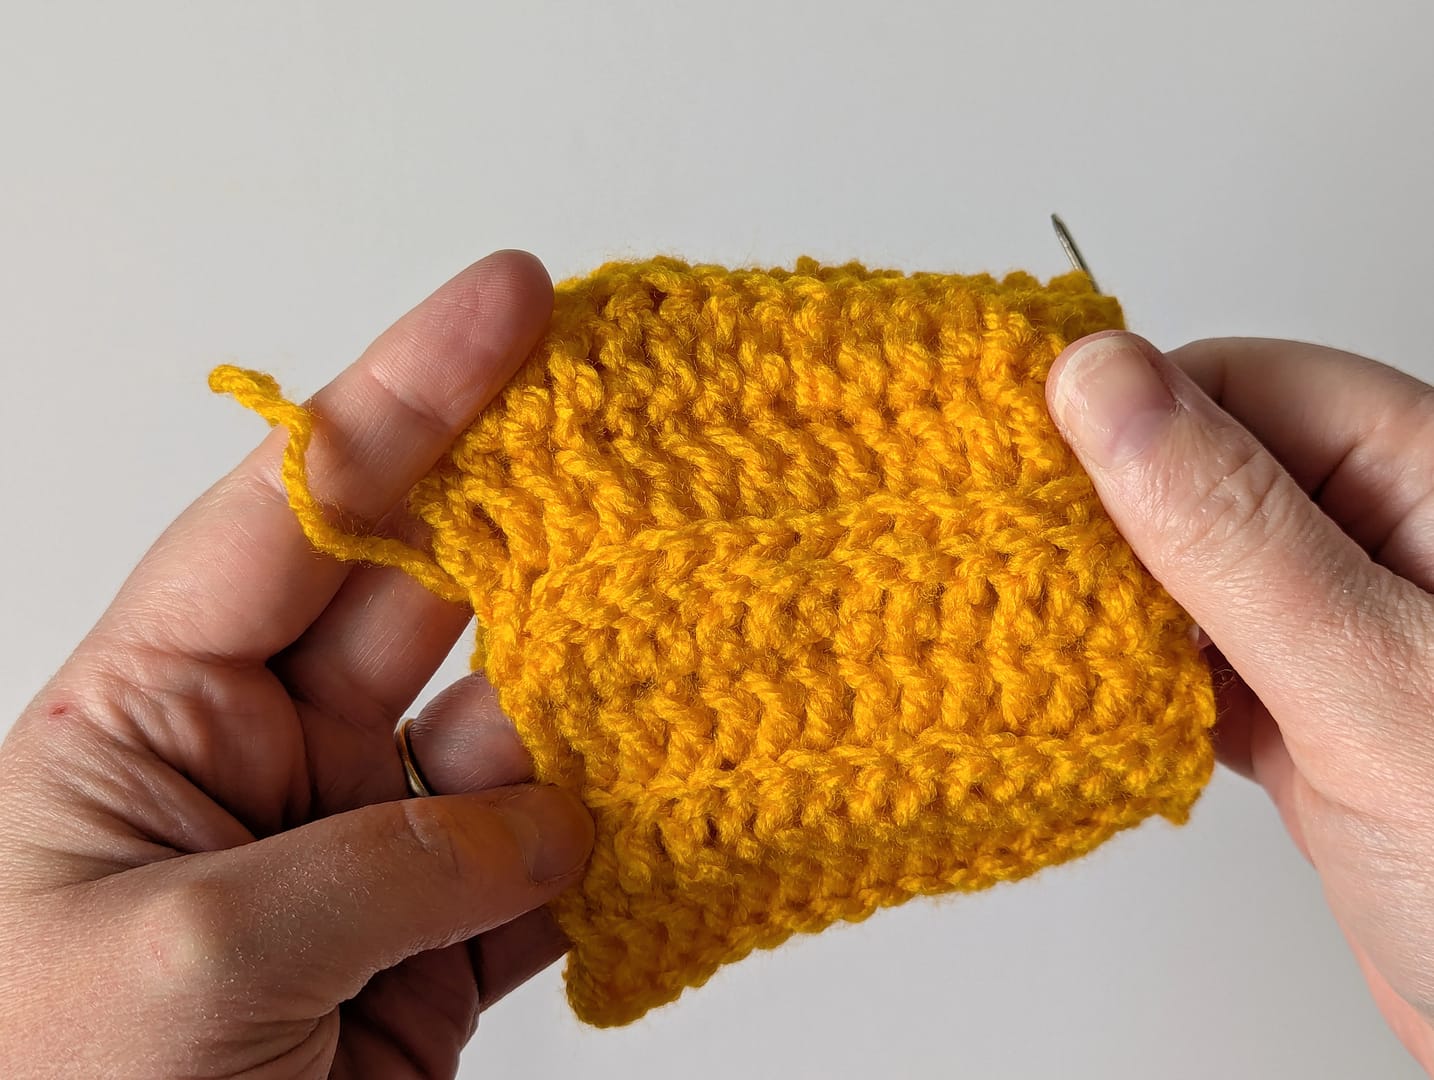
10. Make a couple of small stitches to secure the yarn and weave in the end. Fill the pimpkin with toy stuffing.
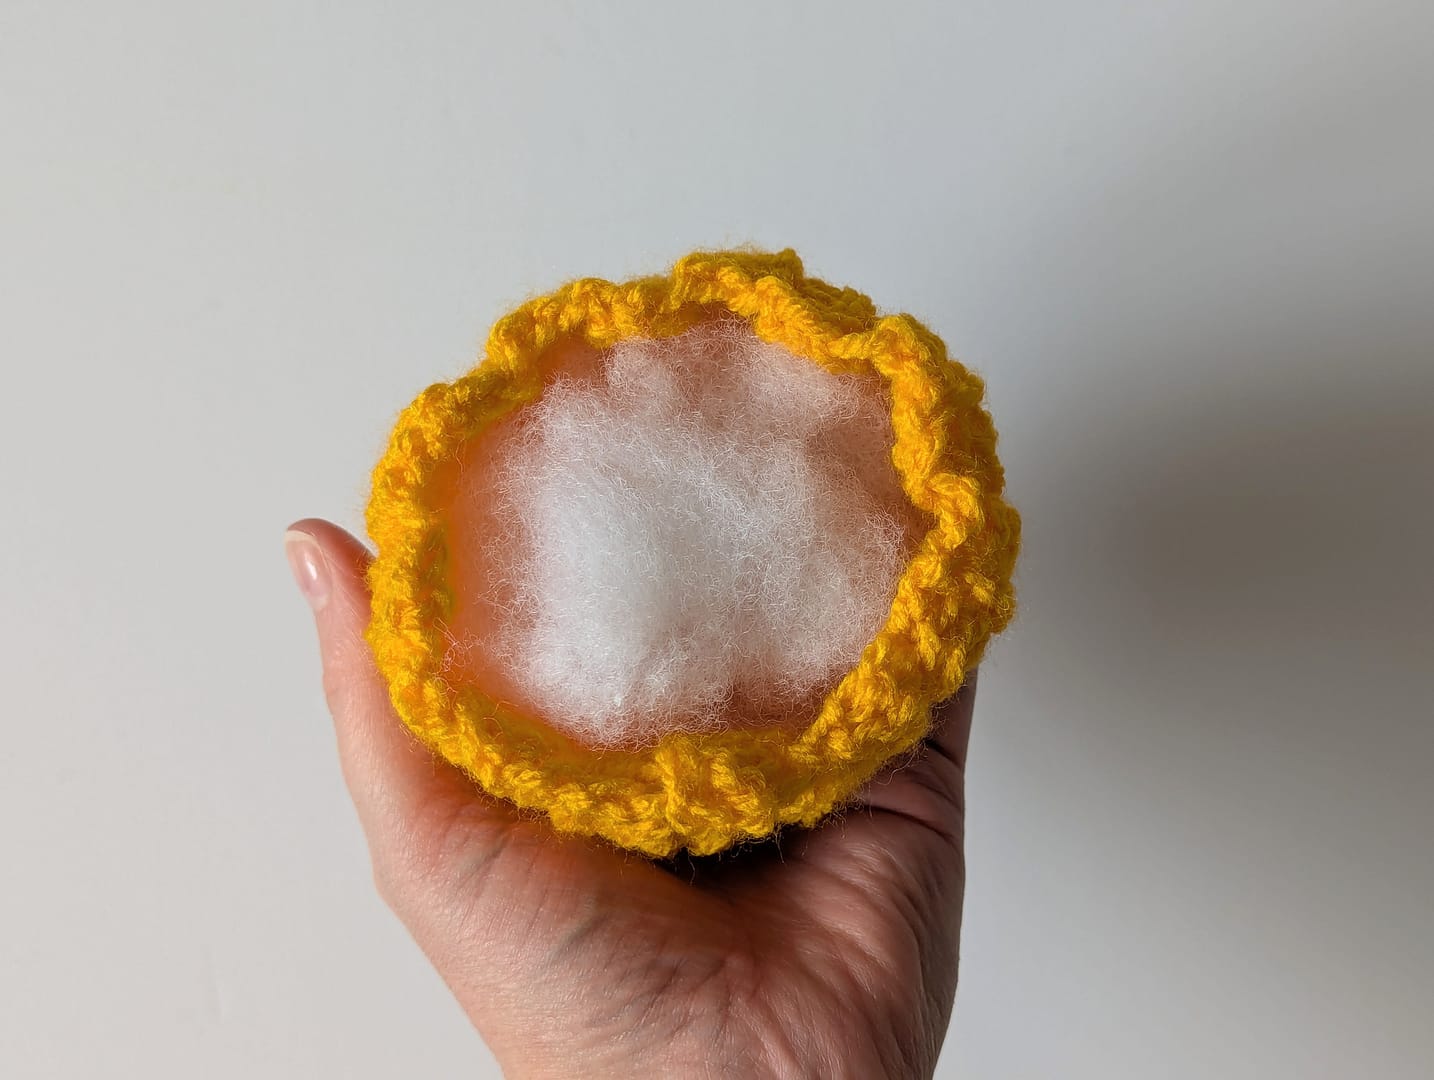
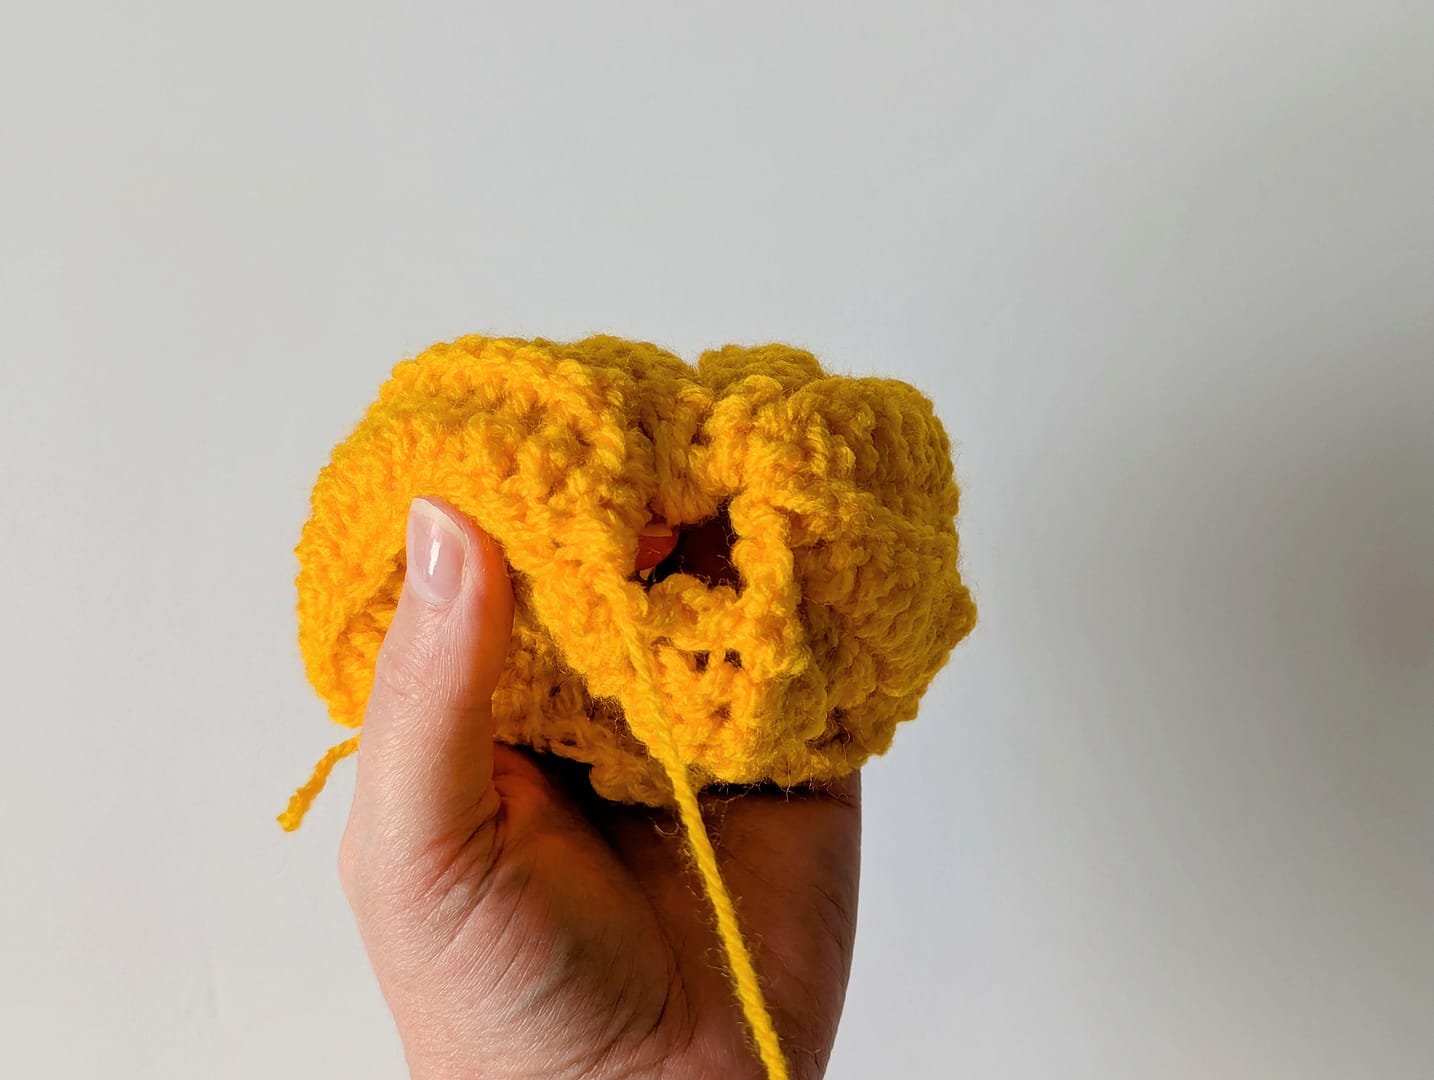
11. Join the yarn to the open end of the pumpkin, and using the yarn needle again thread yarn through all the row ends of the open side. Pull the yarn tight to close the hole and create the pumpkin body, secure the yarn and weave in the end.
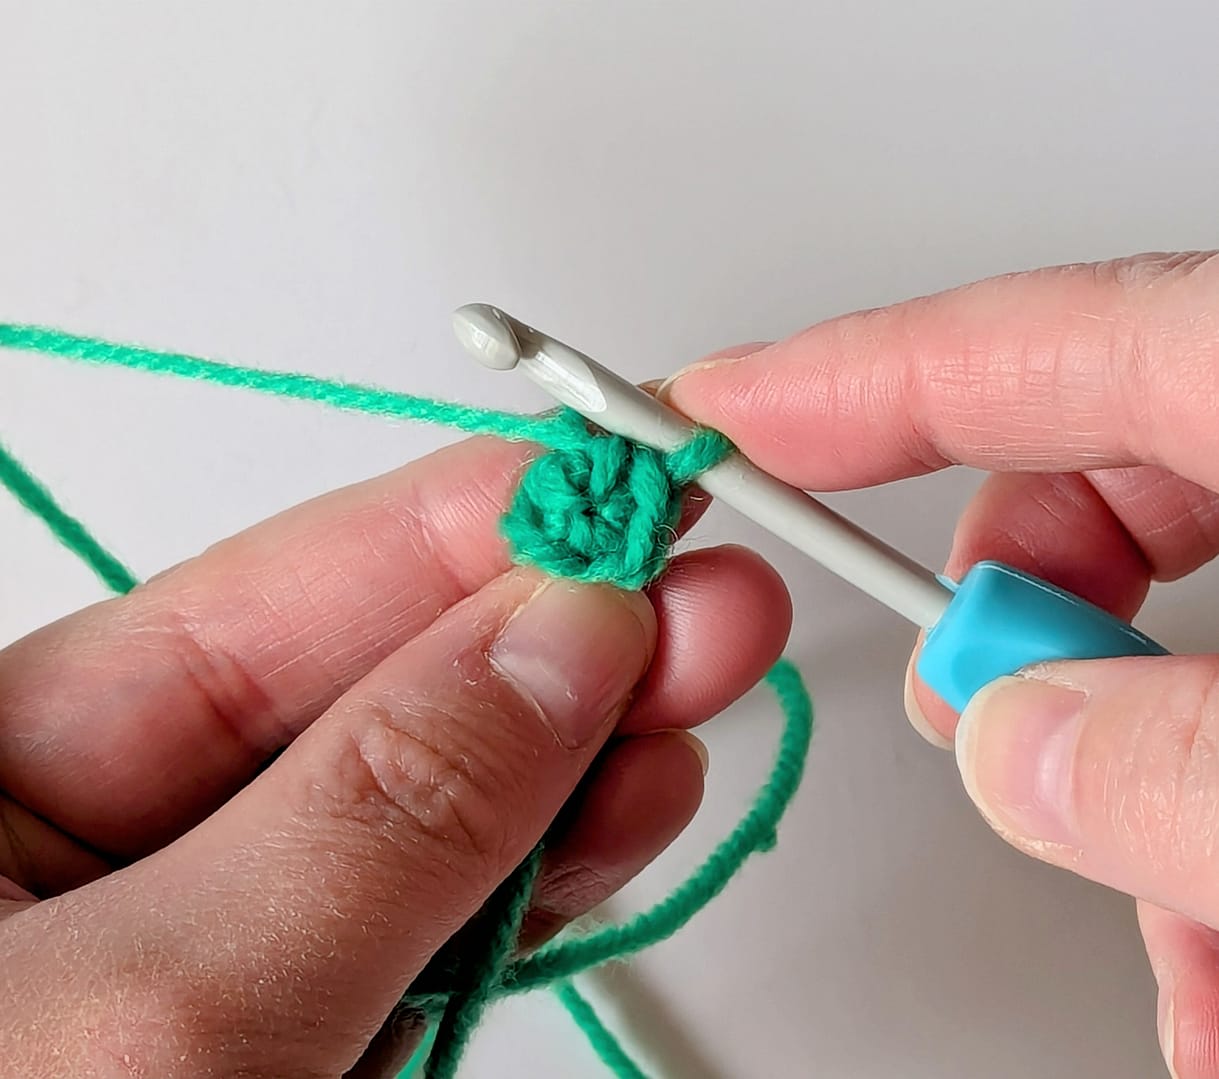
12. Now to make the stalk! Take your Green yarn, and make a magic ring, then make four Double crochet (UK terms) / Single crochet (US terms) stitches into the ring, pull the ring tight to close and make a slip stitch into the first stitch to join the round.
13. Next make one double (UK terms) / single (US terms) crochet stitch into each stitch around (4 stitches), and then repeat this three more times (so you have worked five rows in total).
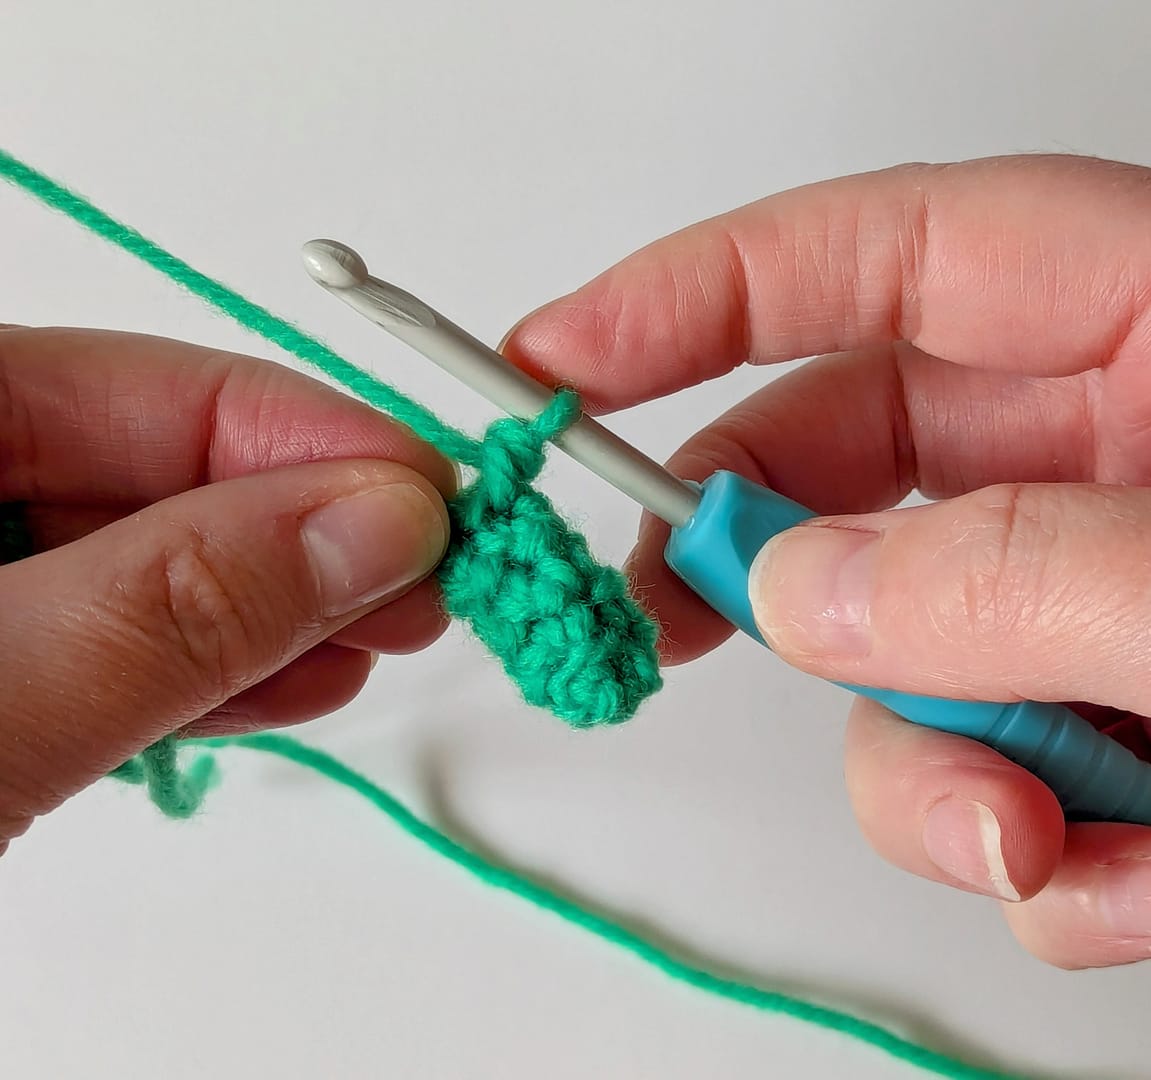
14. For the last round, make two double (UK terms) / single (US terms) crochet stitches into each stitch around, so you now have 8 stitches in total. Cut the yarn leaving a tail for sewing, and fasten off. Thread the yarn tail onto your yarn needle.
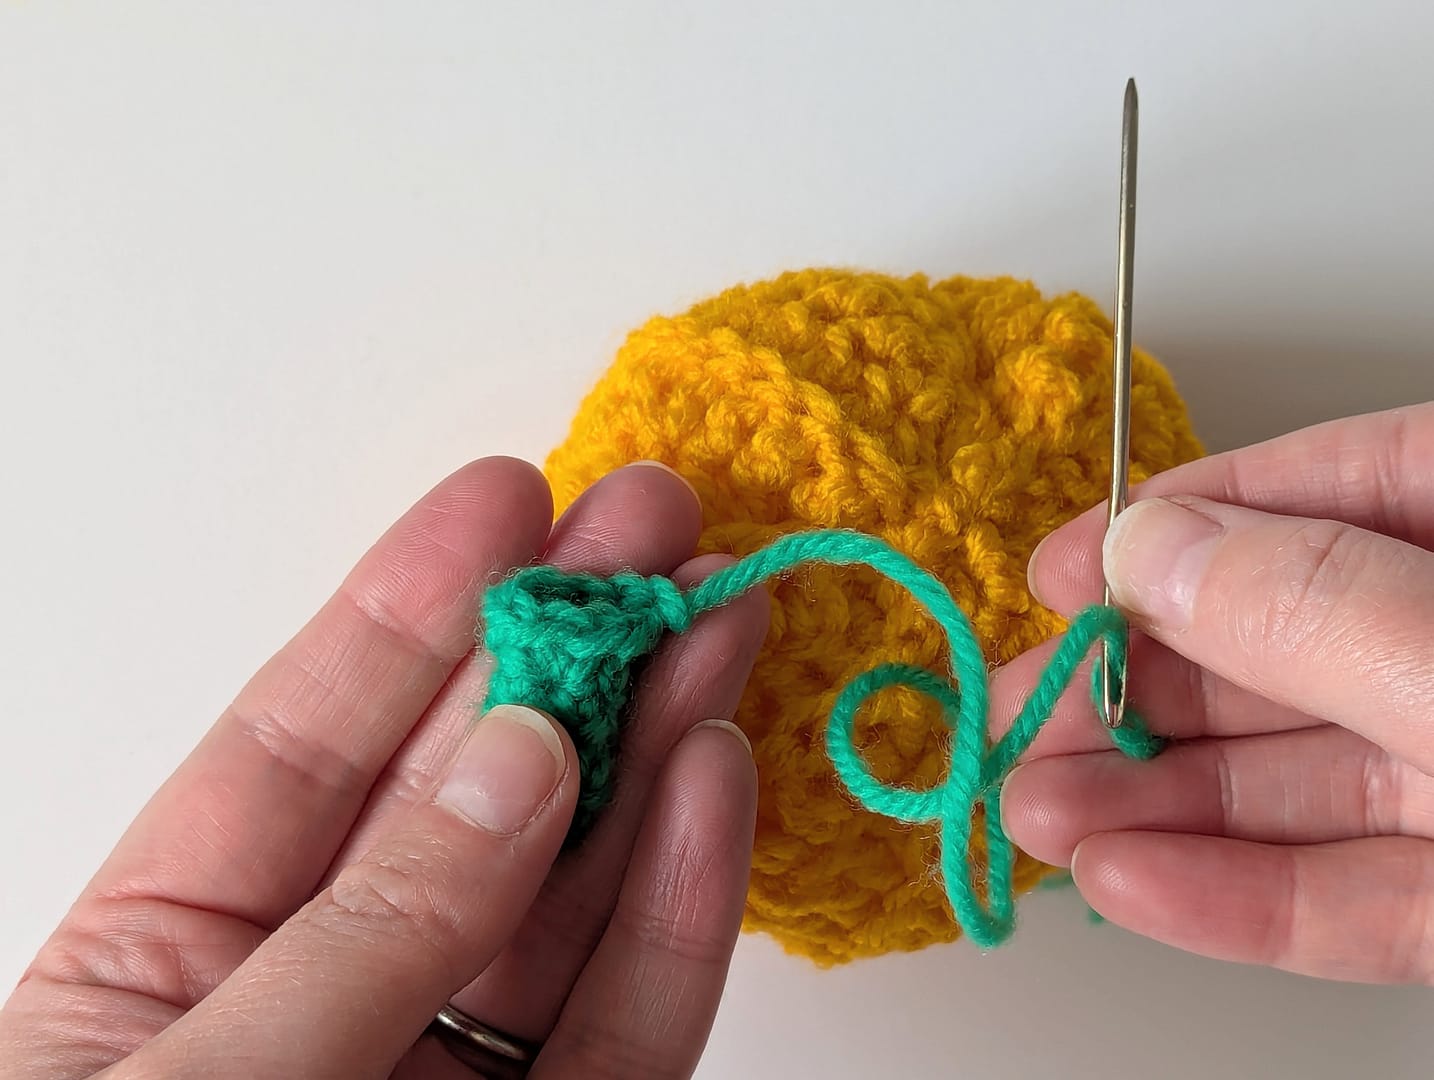
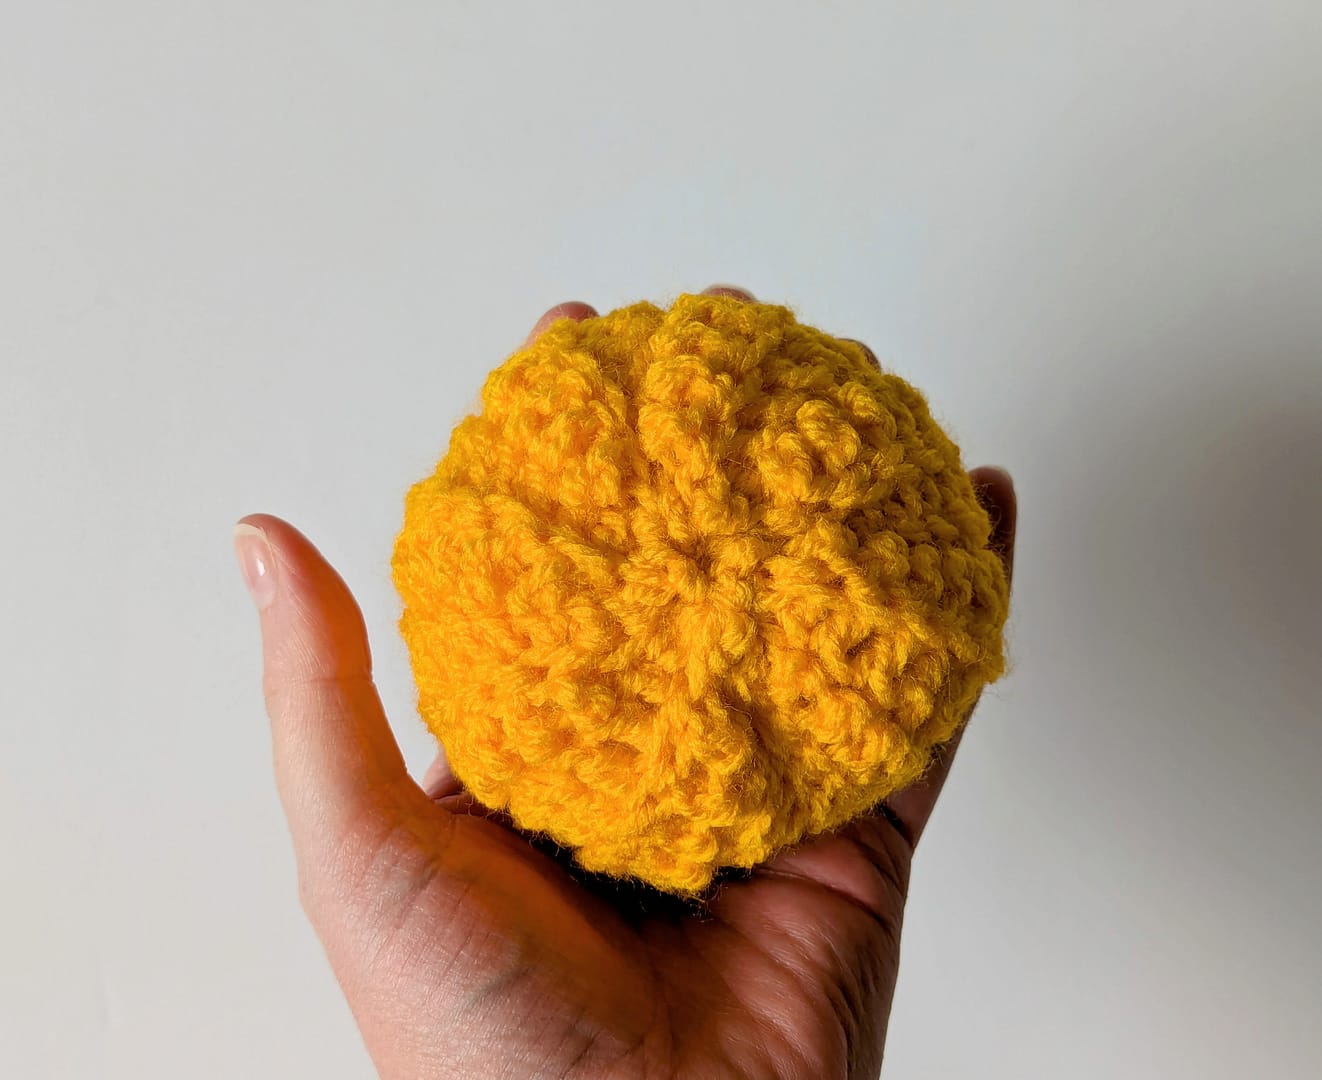
15. Now place the stalk in the centre of the top of the pumpkin and sew in place.
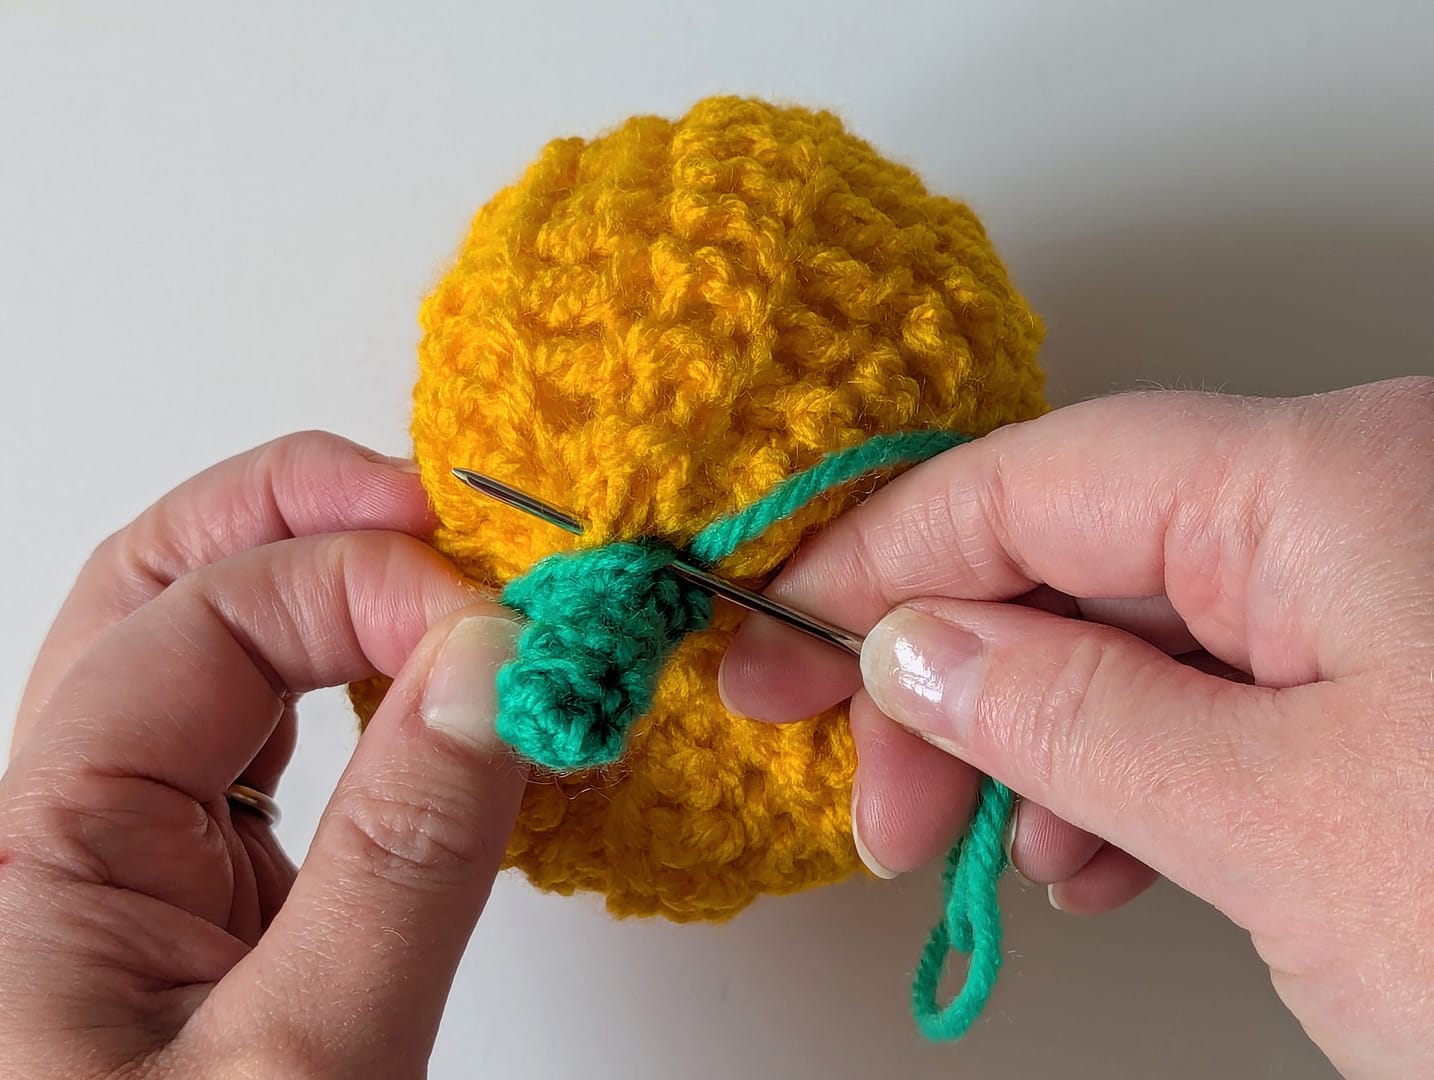
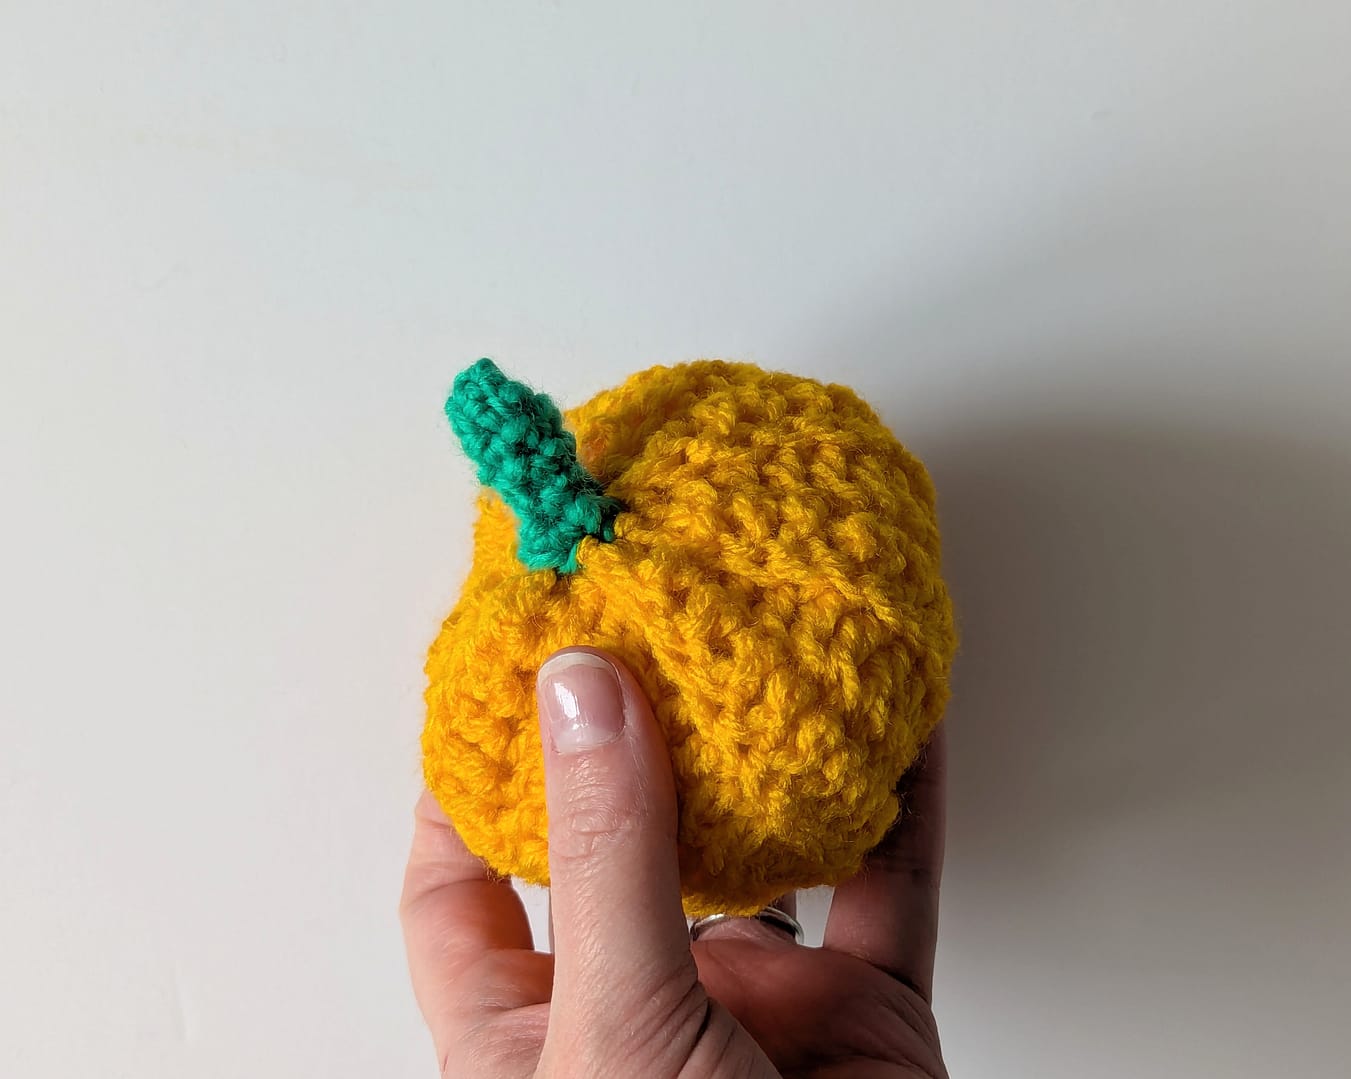
16. The pumpkin is now finished!! Enjoy!!
I hope you’ve enjoyed this pattern! Let me know how you get on, I’d love to know!