Quick and Easy Crochet Star Coaster Pattern
I have always loved stars, when the sky is clear and their bright light shine against the dark sky, I just love everything about them!
Therefore, when I was crocheting with this macramé yarn, I think my brain went subconsciously to stars!
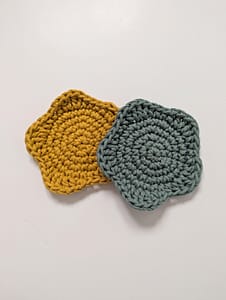
So, I would like to introduce my rounded star coaster crochet pattern!
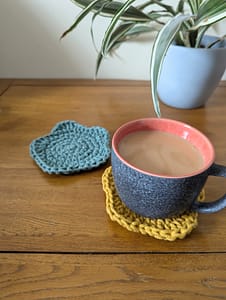
Versatile, quick and easy to make, these super cute star coasters with their rounded points, will bring a touch of whimsy to any home! This pattern is worked in the round, and has a simple edging to create the rounded star points, and best of all, as they are very quick and simple to make you can make a whole set of them in hardly any time at all!
The Pattern
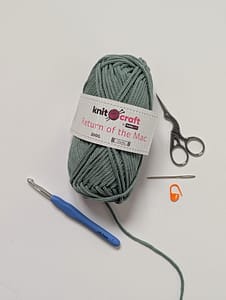
What you’ll need:
- 100% Cotton 3mm Macramé cord – I used Knitcraft Return of the Mac in colours Sage and Mustard
- 6mm crochet hook
- stitch marker
- Large eye tapestry needle
- Scissors
The pattern is written in US crochet terms first and then UK terms (so scroll down a little if you want the UK terms), and then step-by-step instructions with photographs to help guide you through the pattern, enjoy!
US terms
Abbreviations
- ch = chain
- dc = double crochet
- hdc = half double crochet
- M = stitch marker
- rep = repeat
- sc = single crochet
- sl st = slip stitch
- st(s) = stitch(es)
Written Pattern
Make a magic ring. (If you want a tutorial on how to make a magic ring you can find one HERE)
Round 1: 1ch (this does not count as a st), 6sc in ring, sl st in first sc to join. (6 sts) *the sl st does not count as a st*
Round 2: 2sc in each st around, place a M in first stitch to mark the beginning of the round. (12 sts) *remember not to work into the sl st from the end of round 1*
Do not join the rounds from now onwards, but work in continuous rounds, and move the M up each round as you work to mark the first st of each round
Round 3: 2sc in first st, 1sc in next st, *2sc in next st, 1sc in next st; rep from * to end of round. (18 sts)
Round 4: 1sc in first st, 2sc in next st, *1sc in each of next 2 sts, 2sc in next st; rep from * to the last st, 1sc in last st. (24 sts)
Round 5: 2sc in first st, 1sc in each of next 3 sts, *2sc in next st, 1sc in each of next 3 sts; rep from * to end of round. (30 sts)
Round 6: 1hdc in first st, 1hdc in next st, 2dc in each of next 2 sts, 1hdc in next st, 1sc in next st, *1sc in next st, 1hdc in next st, 2dc in each of next 2 sts, 1hdc in next st, 1sc in next st; rep from * to end of round. (40 sts)
Cut yarn and fasten off with an invisible join. Weave in the ends.
Enjoy!
UK terms
Abbreviations
- ch = chain
- dc = double crochet
- htr = half treble crochet
- M = stitch marker
- rep = repeat
- sl st = slip stitch
- st(s) = stitch(es)
- tr = treble crochet
Written Pattern
Make a magic ring. (If you want a tutorial on how to make a magic ring you can find one HERE)
Round 1: 1ch (this does not count as a st), 6dc in ring, sl st in first dc to join. (6 sts) *the sl st does not count as a st*
Round 2: 2dc in each st around, place a M in first stitch to mark the beginning of the round. (12 sts) *remember not to work into the sl st from the end of round 1*
Do not join the rounds from now onwards, but work in continuous rounds, and move the M up each round as you work to mark the first st of each round
Round 3: 2dc in first st, 1dc in next st, *2dc in next st, 1dc in next st; rep from * to end of round. (18 sts)
Round 4: 1dc in first st, 2dc in next st, *1dc in each of next 2 sts, 2dc in next st; rep from * to the last st, 1dc in last st. (24 sts)
Round 5: 2dc in first st, 1dc in each of next 3 sts, *2dc in next st, 1dc in each of next 3 sts; rep from * to end of round. (30 sts)
Round 6: 1htr in first st, 1htr in next st, 2tr in each of next 2 sts, 1htr in next st, 1dc in next st, *1dc in next st, 1htr in next st, 2tr in each of next 2 sts, 1htr in next st, 1dc in next st; rep from * to end of round. (40 sts)
Cut yarn and fasten off with an invisible join. Weave in the ends.
Enjoy!
Step by Step Pattern
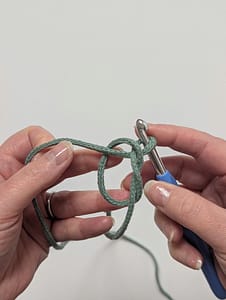
- Start by making a magic ring.
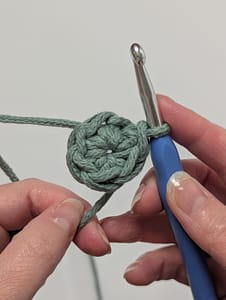
2. Make one chain stitch (this does not count as a stitch but gets to the right height to start the round), and then make 6 single crochet stitches (double crochet stitches in UK terms), into the ring, pull the yarn tail tight to close the ring and slip stitch into the first stitch to join the round. (This slip stitch does not count as a stitch)
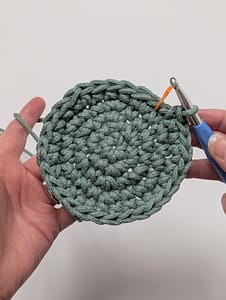
3. Make 2 single crochet stitches into each stitch around, placing a stitch marker into the first stitch to mark the beginning of the round.
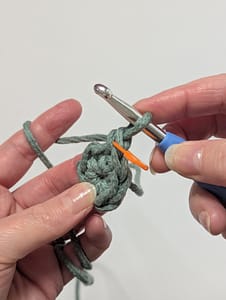
4. Do not join at the end of round 2, and remember not to work into the slip stitch from round 1, your work should look like this at the end of round 2:
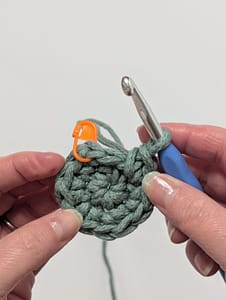
5. Round 3 starts in the first single crochet stitch from round 2 (the one you marked with a stitch marker). For Round 3, make 2 stitches into the first stitch, then 1 stitch into the next stitch, and repeat this sequence all around (2 single crochet stitches into the first stitch, and 1 single crochet stitch into the next stitch), so the stitch count increases to 18 stitches.
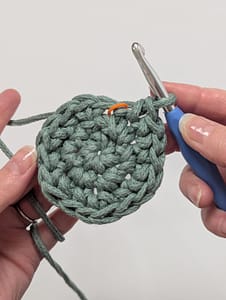
6. Round 4 increases the stitch count again, but we move the stitches where the increases occur to keep the shape more like a circle. For Round 4 make one single crochet stitch into the first stitch, then 2 single crochet stitches into the next stitch, then the repeating pattern starts, make one single crochet stitch in each of the next 2 stitches, and then 2 single crochet stitches into the third stitch. Repeat this 3 stitch pattern, until you reach the last stitch, then work 1 single crochet stitch into the last stitch. You should have 24 stitches.

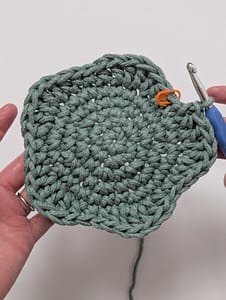
7. Round 5 is again worked in single crochet stitches, with a repeating pattern of: 2 single crochet stitches made in the first stitch, then 1 single crochet stitch worked in each of the next 3 stitches, repeat this 4 stitch pattern across all the stitches to increase the number of stitches to 30.
8. Now for the star points! Round 6 begins with one half double crochet stitch worked into the first stitch (the first stitch is a half double crochet to help with the height of the stitches), then work 1 half double crochet stitch into the next stitch, then 2 double crochet stitches into each of the next 2 stitches, 1 half double crochet stitch in the next stitch and 1 single crochet stitch into the next stitch. Now work this repeating pattern over the next 6 stitches; 1 single crochet stitch into the next stitch, 1 half double crochet stitch into the next stitch, 2 double crochet stitches into each of the next 2 stitches, 1 half double crochet stitch into the next stitch, and 1 single crochet stitch into the next stitch. Repeat this pattern all around until the end of the round.
9. We are going the finish the coaster with an invisible join. Cut the yarn and pull the last loop up.
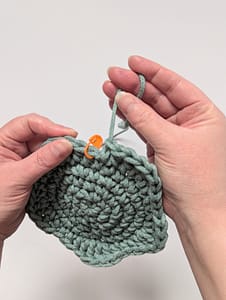
10. Thread the yarn tail onto a tapestry needle.
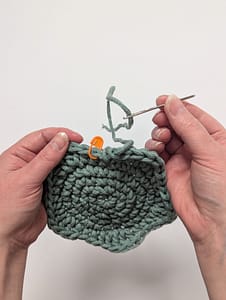
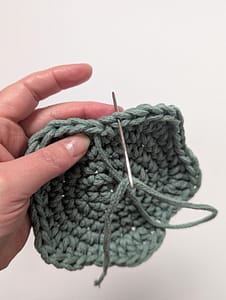
11. Thread the yarn tail through the next stitch, under the two loops (the V) from back to front.
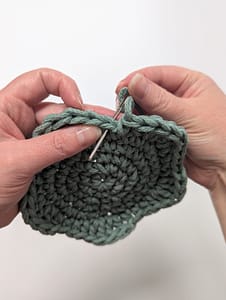
12. Then thread the yarn tail through the back loop only of the previous stitch. This creates the invisible join.
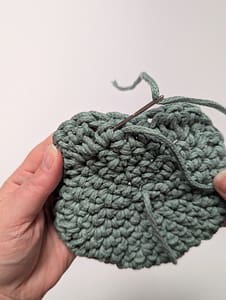
13. Weave in the yarn ends.
14. Ta dah! You have finished your rounded star coaster! Amazing!!
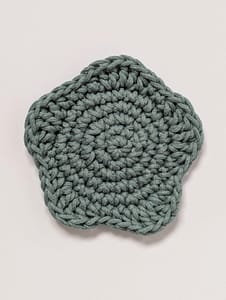

The first photo is the Front and the second picture (with my hand!) is the Back of the coaster.
Now you can make as many coasters as you wish and use any colours you choose!
Let me know how you get on with your coasters! I’d love to see any you make!
I hope you’ve enjoyed this pattern!