I found some super soft and squishy yarn in my yarn stash recently which I had completely forgotten about! It’s a mix of wool, yak, alpaca and nylon yarn, so it’s super soft but it’s also durable enough to make hard wearing items with, and it’s also got a fantastic stretchy quality to it.
The weather is still cool here in the UK, and so my mind went straight to a cowl, but something with a textured pattern is what I had in mind, but I still wanted to keep it straightforward and simple, and so I tried out the V stitch pattern in this yarn and I though it looked absolutely fantastic!
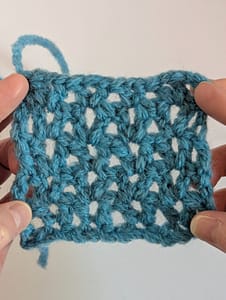
I’ve made a stitch pattern tutorial, so you can see a close up of how to do the V stitch pattern here!
I find that cowls are great for keeping my neck warm but they have less length than a scarf and are smaller and therefore a bit easier to carry around with me if I know I will be wanting to take it off a reasonable amount of time, for example, say if I was going shopping, I know I will want to take it off whilst I’m inside a shop but I will want to put it back on again as soon as I go outside, I find cowls are not as cumbersome as well, and this yarn I’m using has a very lightweight feel to it.
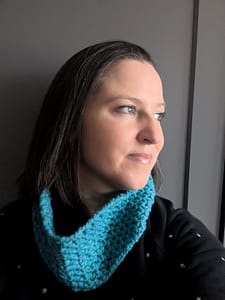
I absolutely love how this cowl turned out, I think it looks great in the V stitch pattern, and it’s so cozy and warm, it’s perfect for the cooler winter weather!
Want to make this cowl for yourself? Find the pattern below, both in US and UK crochet terms!
Mindful Cozy V stitch Cowl crochet pattern
You will need:
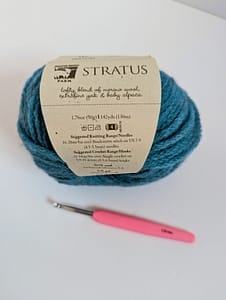
- Chunky weight yarn – I used Juniper Moon Farm Stratus Yarn in Vanilla Sky (one 50g ball is enough to make the cowl)
- 5.5mm crochet hook
- Stitch markers
- Yarn needle
- scissors
Size
The finished cowl measures 11cm high and approximately 62cm in circumference
UK terms
Abbreviations:
- ch = chain
- ch-sp = chain space;
- sl st = slip stitch
- st(s) = stitch(es)
- tr = treble crochet
PATTERN
Foundation chain: Make 102ch, place a stitch marker every 25 chain stitches to help you keep count, then ensuring the chain stitches are straight, all facing the same way and not twisted, sl st into the very first ch to form a loop.
Round 1: 4ch (this counts as 1tr and 1ch throughout), 1tr in fifth ch from your hook (the first chain from the foundation ch), *miss next 2ch, (1tr, 1ch, 1tr) worked together in next ch; rep from * to last 2 ch, miss last 2 ch, and sl st into third of 4 starting ch.
Round 2: Sl st into first 1ch-sp, 4ch, 1tr in same ch-sp, *(1tr, 1ch, 1tr) worked together in next 1ch-sp; rep from * to end of round (and you have worked a V stitch into the last 1ch-sp), join with sl st in the third of the 4 starting ch.
Repeat Round 2 seven more times or until the cowl measures your desired height.
Cut yarn and fasten off.
Weave in both yarn ends and enjoy!
US terms
Abbreviations:
- ch = chain
- ch-sp = chain space
- dc = double crochet
- sl st = slip stitch
- st(s) = stitch(es)
PATTERN
Foundation chain: Make 102ch, place a stitch marker every 25 chain stitches to help you keep count, then ensuring the chain stitches are straight, all facing the same way and not twisted, sl st into the very first ch to form a loop.
Round 1: 4ch (this counts as 1dc and 1ch throughout), 1dc in fifth ch from your hook (the first chain from the foundation ch), *miss next 2ch, (1dc, 1ch, 1dc) worked together in next ch; rep from * to last 2 ch, miss last 2 ch, and sl st into third of 4 starting ch.
Round 2: Sl st into first 1ch-sp, 4ch, 1dc in same ch-sp, *(1dc, 1ch, 1dc) worked together in next 1ch-sp; rep from * to end of round (and you have worked a V stitch into the last 1ch-sp), join with sl st in the third of the 4 starting ch.
Repeat Round 2 seven more times or until the cowl measures your desired height.
Cut yarn and fasten off.
Weave in both yarn ends and enjoy!
Step by Step instructions:
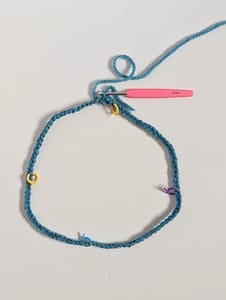
- Start by making a foundation chain of 102 stitches, I like to place a stitch marker every 25 stitches to help me keep count.
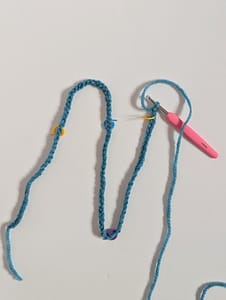
2. Ensuring the chain stitches are all facing the same way and it’s not twisted, make a slip stitch into the very first chain to join it together to form a loop.
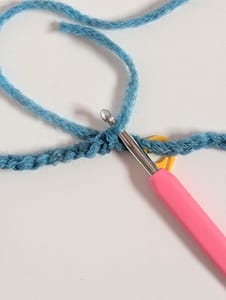
3. Now we start round 1, begin with four chain stitches, these will act as the first double crochet stitch (treble crochet stitch in UK terms) and the first one chain space.
4. Then make one double crochet stitch (treble crochet stitch in UK terms), into the chain at the base of your four chain stitches, i.e. the first chain stitch from your foundation chain loop, this forms the first V stitch!

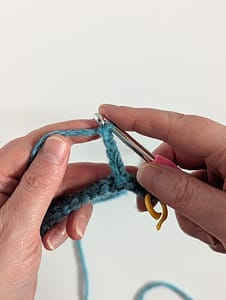
5. Now, miss the next two chain stitches from the foundation chain and work a V stitch into the next chain stitch. A V stitch consists of one double crochet stitch, one chain stitch, and another double crochet stitch all worked into the same stitch, (one treble crochet stitch, one chain stitch and a second treble crochet stitch in UK terms). As we are working into the foundation chain, this first V stitch will be worked into the third chain stitch along.
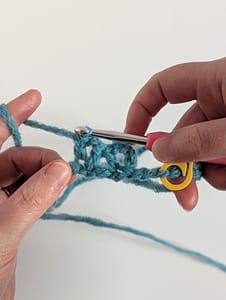
6. Now continue the pattern along the foundation chain, working a V stitch into every third chain stitch until you only have two chain stitches left.
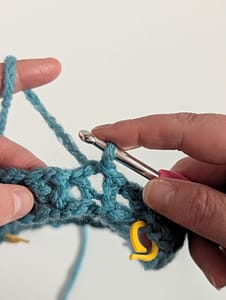
7. To finish the first round we are not going to work into any more foundation chains, but we are going to join the round by working a slip stitch into the third chain stitch from the beginning four chains (i.e. the equivalent of working into the top of the double crochet stitch, as the first four chains counted as one double crochet and one chain stitch).
8. To start the next row, so that we being in the correct place, make one more slip stitch into the first one chain space (i.e. over the fourth chain stitch from the beginning four chain at the start of row one), we are now in the correct position to start the next row.
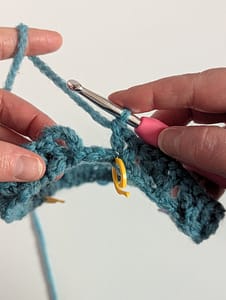
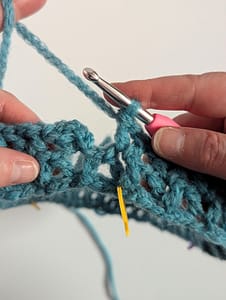
9. Start the next row again with four chain stitches, these will act as the first double crochet stitch and a one chain space (one treble crochet stitch and one chain stitch in UK terms), and make one double crochet stitch (treble crochet in UK terms), into the one chain space at the base of your four chains (the same one chain space you worked your last slip stitch into). This creates the first V stitch of the next row.
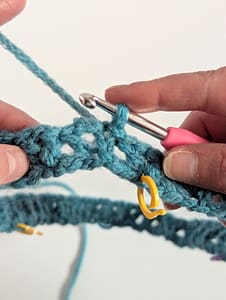
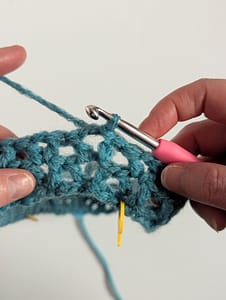
10. Continue to work V stitches into each one chain space across the whole round until you have worked a V stitch into the last one chain space.
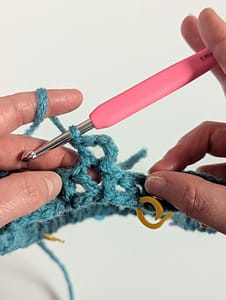
11. Join the round in the same way, by working a slip stitch into the third of the beginning four chains.
12. Repeat steps 8 to 11 to work the next row.
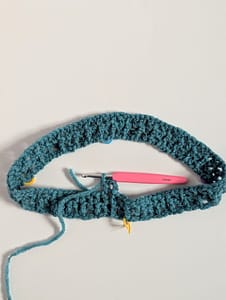
13. Continue repeating steps 8 to 11, making seven more rows, or until the cowl is at the height you want it to be.
14. Cut the yarn, pull it through the last loop and weave in the yarn tails and cut flush.

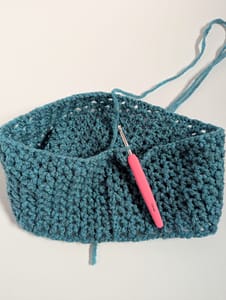
There you have, your finished cowl!! Fantastic!
Now you can feel happy with your finished cowl, and your neck will feel lovely and warm in the cold weather! Enjoy!!
