
Ice Cream Cone Crochet Pattern
It has definitely turned to Summer here in the UK and the weather is feeling wonderfully hot!
It might not be the weather for creating big heavy blankets, but there are still many items to be made in the warm weather!
I am a big fan of ice cream, and all things that are cute, and while relaxing during a hot summer weekend I created these super cute ice cream cones – I love how they turned out! Plus they are light and small, a perfect make for the hot weather!
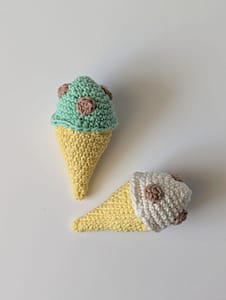
Although there are some parts of this crochet item that can be a little fiddly, they are actually very straight forward! As long as you can make a single crochet stitch and a half double crochet stitch (double crochet and half treble in UK terms), and you can sew a few basic stitches, you can absolutely make these cute ice creams!
I’ve written the pattern out in US crochet terms and then UK crochet terms, and then step instructions with photographs at the end, so please scroll to which ever section you want to follow! Hope you enjoy!
The Pattern
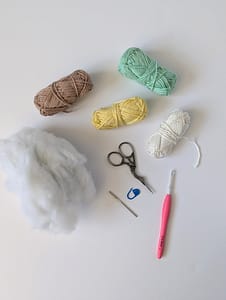
What you’ll need:
- 25g balls of Sport / Light DK 100% cotton yarn in various colors for your ice creams; you will need a color for the cone, a color for the ice cream, and another color for the toppings – I used HELLO yarn 100% cotton light DK yarn, it doesn’t need to be 100% cotton but this is what I had to hand
- 2.5mm crochet hook (or an appropriate sized hook for your yarn)
- Stitch marker
- Yarn needle
- Scissors
US Crochet Terms
Abbreviations
- ch = chain
- M = stitch marker
- hdc = half double crochet
- rep = repeat
- sc = single crochet
- sl st = slip stitch
- st(s) = stitch(es)
Written Pattern
CONE
Using the yarn color for your cone, make a magic ring (if you want to know how to make a magic ring you can find my tutorial here!)
Round 1: 1ch (this does not count as a stitch throughout), 4sc in ring, pull ring tight to close. (4 sts)
The cone is worked in continuous rounds, place a M in the first st to mark the beginning of the round and move it up each round as you work to keep track of your sts
Round 2: 4sc.
Round 3: *1sc, 2sc in next st; rep from * to end of round. (6 sts)
Round 4: 6sc.
Round 5: *1sc, 2sc in next st; rep from * to end of round. (9 sts)
Round 6: 9sc.
Round 7: *2sc, 2sc in next st; rep from * to end of round. (12 sts)
Round 8: 12sc.
Round 9: *2sc, 2sc in next st; rep from * to end of round. (16 sts)
Round 10: 16sc.
Round 11: *3sc, 2sc in next st; rep from * to end of round. (20 sts)
Round 12: 20sc.
Round 13: *3sc, 2sc in next st; rep from * to end of round. (25 sts)
Round 14: 25sc.
Round 15: *4sc, 2sc in next st; rep from * to end of round. (30 sts)
Round 16: 30sc.
Cut yarn and fasten off, weave in the end.
ICE CREAM
Using the yarn for your ice cream, make a magic ring.
Round 1: 1ch (does not count as a st), 6sc in ring, pull ring tight to close. (6 sts)
The ice cream is also worked in continuous rounds, place a M in the first st to mark the beginning of the round and move it up each round as you work to keep track of your sts
Round 2: *1sc, 2sc in next st; rep from * to end of round. (9 sts)
Round 3: *2sc, 2sc in next st; rep from * to end of round. (12 sts)
Round 4: *3sc, 2sc in next st; rep from * to end of round. (15 sts)
Round 5: *2sc, 2sc in next st; rep from * to end of round. (20 sts)
Round 6: *3sc, 2sc in next st; rep from * to end of round. (25 sts)
Round 7: *4sc, 2sc in next st; rep from * to end of round. (30 sts)
Rounds 8 and 9: 30sc.
Round 10: 4hdc, 1sc, *1sc, 3hdc, 1sc; rep from * to end of round.
Cut yarn, leaving a long yarn tail for sewing later, and fasten off with an invisible join.
CHOCOLATE CHIPS
Using the color yarn for your chocolate chips (or these could be colorful sprinkles if you wanted!), make a magic ring.
Round 1: 6sc in ring, pull ring tight to close and sl st in first sc to join.
Cut yarn, leaving a long yarn tail for sewing later.
Make as many chocolate chips as you would like for your ice cream – I made 4 in total.
MAKING UP
- Identify where you want your chocolate chips to be on your ice cream. I placed them on top of the ice cream to see what they looked like first and made sure I was happy with their position. When you’re happy with what they look like sew the chocolate chips in place.
- Next place toy stuffing inside of the ice cream cone, and then side the ice cream.
- Place the ice cream on top of the cone and using the yarn tail from the ice cream sew the ice cream to the cone. Sew the ice cream using the stitches from round 9 so that the stitches from round 10 are slightly over the cone.
- Weave in all ends and enjoy!!
UK Crochet Terms
Abbreviations
- ch = chain
- dc = double crochet
- M = stitch marker
- htr = half treble crochet
- rep = repeat
- sl st = slip stitch
- st(s) = stitch(es)
Written Pattern
CONE
Using the yarn colour for your cone, make a magic ring (if you want to know how to make a magic ring you can find my tutorial here!)
Round 1: 1ch (this does not count as a stitch throughout), 4dc in ring, pull ring tight to close. (4 sts)
The cone is worked in continuous rounds, place a M in the first st to mark the beginning of the round and move it up each round as you work to keep track of your sts
Round 2: 4dc.
Round 3: *1dc, 2dc in next st; rep from * to end of round. (6 sts)
Round 4: 6dc.
Round 5: *1dc, 2dc in next st; rep from * to end of round. (9 sts)
Round 6: 9dc.
Round 7: *2dc, 2dc in next st; rep from * to end of round. (12 sts)
Round 8: 12dc.
Round 9: *2dc, 2dc in next st; rep from * to end of round. (16 sts)
Round 10: 16dc.
Round 11: *3dc, 2dc in next st; rep from * to end of round. (20 sts)
Round 12: 20dc.
Round 13: *3dc, 2dc in next st; rep from * to end of round. (25 sts)
Round 14: 25dc.
Round 15: *4dc, 2dc in next st; rep from * to end of round. (30 sts)
Round 16: 30dc.
Cut yarn and fasten off, weave in the end.
ICE CREAM
Using the yarn for your ice cream, make a magic ring.
Round 1: 1ch (does not count as a st), 6dc in ring, pull ring tight to close. (6 sts)
The ice cream is also worked in continuous rounds, place a M in the first st to mark the beginning of the round and move it up each round as you work to keep track of your sts
Round 2: *1dc, 2dc in next st; rep from * to end of round. (9 sts)
Round 3: *2dc, 2dc in next st; rep from * to end of round. (12 sts)
Round 4: *3dc, 2dc in next st; rep from * to end of round. (15 sts)
Round 5: *2dc, 2dc in next st; rep from * to end of round. (20 sts)
Round 6: *3dc, 2dc in next st; rep from * to end of round. (25 sts)
Round 7: *4dc, 2dc in next st; rep from * to end of round. (30 sts)
Rounds 8 and 9: 30dc.
Round 10: 4htr, 1dc, *1dc, 3htr, 1dc; rep from * to end of round.
Cut yarn, leaving a long yarn tail for sewing later, and fasten off with an invisible join.
CHOCOLATE CHIPS
Using the colour yarn for your chocolate chips (or these could be colourful sprinkles if you wanted!), make a magic ring.
Round 1: 6dc in ring, pull ring tight to close and sl st in first dc to join.
Cut yarn, leaving a long yarn tail for sewing later.
Make as many chocolate chips as you would like for your ice cream – I made 4 in total.
MAKING UP
- Identify where you want your chocolate chips to be on your ice cream. I placed them on top of the ice cream to see what they looked like first and made sure I was happy with their position. When you’re happy with what they look like sew the chocolate chips in place.
- Next place toy stuffing inside of the ice cream cone, and then side the ice cream.
- Place the ice cream on top of the cone and using the yarn tail from the ice cream sew the ice cream to the cone. Sew the ice cream using the stitches from round 9 so that the stitches from round 10 are slightly over the cone.
- Weave in all ends and enjoy!!
STEP PHOTOGRAPHS
- Start by making the ice cream cone. I used a yellow yarn for this. Begin with a magic ring and make 4 single crochet stitches into the ring, and pull the ring tight to close.
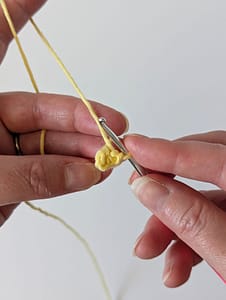
2. This first bit can be a little fiddly as there aren’t many stitches, but stick with it, the cone gets easier as it gets bigger! Make the first stitch of the next round and place a stitch marker in that stitch to help you keep track of where the rounds begin and end.
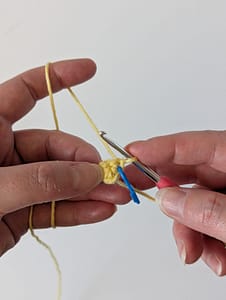
3. The cone is worked by increasing the number of stitches you have every alternate round, so for rounds 1 and 2 just make 4 single crochet stitches, and then increase 2 stitches in round 3 so you have 6 stitches. It should look like this:
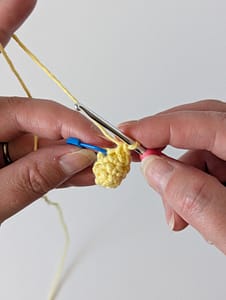
4. The continue the pattern increasing by the number of stitches stated every alternate round, you increase the stitch count by working 2 single crochet stitches into the same stitch as indicated in the written pattern. By round 7 you should have 12 stitches.
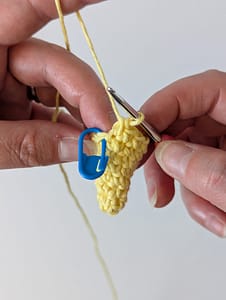
5. Continue in the same pattern using the same yarn, and you should be able to see the cone shape. By round 11 you should have 20 stitches.
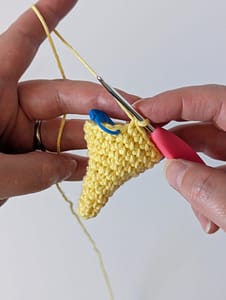
6. Continue increasing the stitch count every alternate round up to round 15, where you should have 30 stitches.
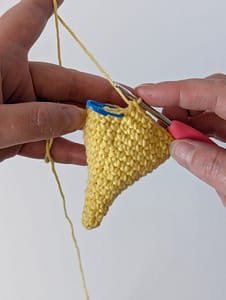
7. Work one more round without increasing the stitch count – make 30 single crochet stitches, and cut the yarn and fasten off as usual.
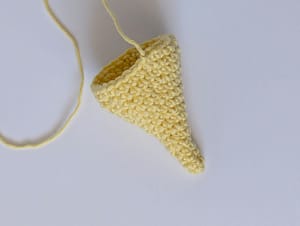
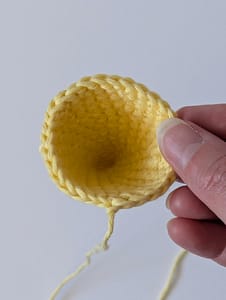
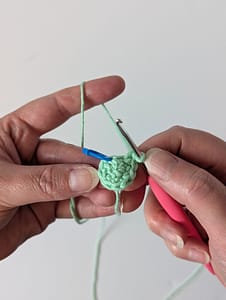
8. Weave in the end for the ice cream cone, and then begin with the ice cream (for the top). I’ve decided to make a mint choc chip ice cream here, but you can use any ice cream color! Start again with a magic ring, and make 6 single crochet stitches into the ring this time, pull the ring tight to close. Start round 2 and place a stitch marker in the first stitch. Increase every other stitch for round 2 so you will have 9 stitches now.
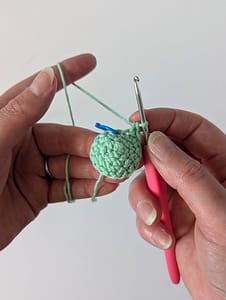
9. For the ice cream we are going to increase the stitch count every round up to round 7. Again we make the increases by working 2 single crochet stitches into the same stitch where indicated in the written pattern. At the end of round 7 you will have 30 stitches.
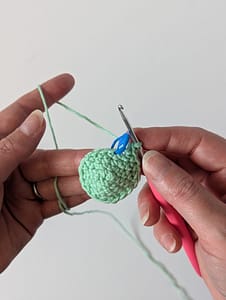
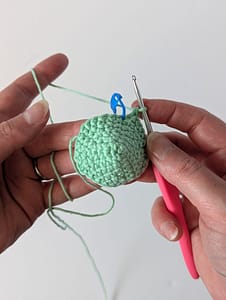
10. Rounds 8 and 9 are worked straight without any increases, so make 30 single crochet stitches. Then for Round 10 we are going to make a slightly curved edge for the end of the ice cream. The curve is created by working one single crochet stitch, then 3 half double crochet stitches and a single crochet stitch (this round starts with a half double though to help the round look smooth). This round overlaps the cone when sewn together to create a more hidden join (the stitches used to sew the top and the bottom together will be hidden by this round).
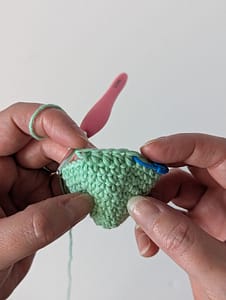
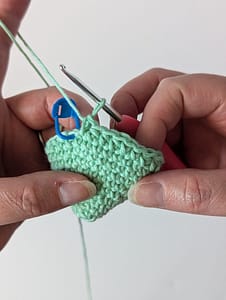
11. As the finish for the ice cream will be more visible, end the ice cream with an invisible join. Start by cutting the yarn (leaving a long tail for sewing), and pull through the last loop. Then thread the yarn tail onto a yarn needle. Thread the needle under both loops of the next stitch from the inside to the outside.
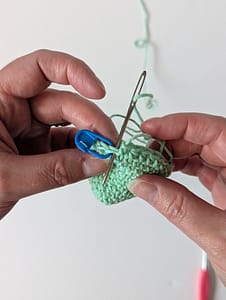
12. Then thread the needle through the back loop only of the previous stitch.
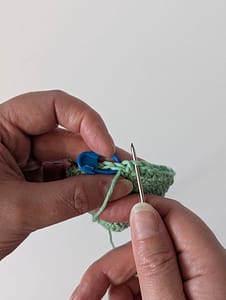
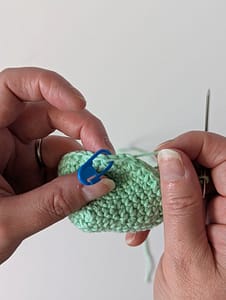
13. Pull the yarn through and you have worked an invisible join.
14. Next make the chocolate chips. I’ve used a chocolate brown color for mine, but you could make sprinkles and make them any color you like! Begin with a magic ring, and make 6 single crochet stitches into the ring.
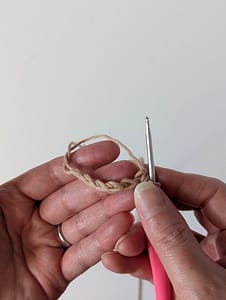
15. Pull the ring tight to close and slip stitch into the first single crochet stitch to join.
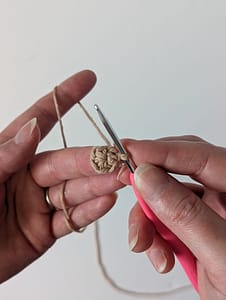
16. And that’s one chocolate chip made! Cut the yarn, leaving a tail for sewing and pull through to fasten off. Make as many chocolate chips as you would like for your ice cream, I made 4 and I like how the 4 looked on my ice cream, but it’s up to you! Thread the yarn tail onto a yarn needle ready to sew onto the ice cream.
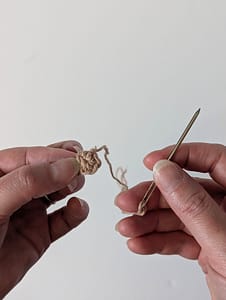
17. Check where you want your chocolate chips to be placed onto the ice cream, and when you are happy sew the chocolate chips in place.
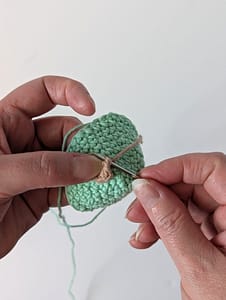
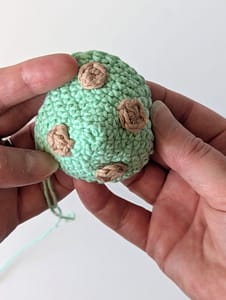
18. Weave in all the chocolate chip yarn ends. Next place toy stuffing into both the ice cream cone and the ice cream.
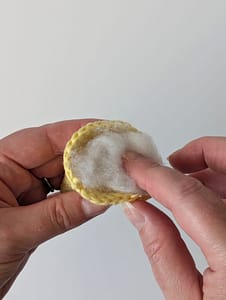
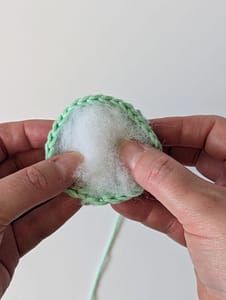
19. Place the ice cream on top of the cone and using the ice cream yarn tail, sew the ice cream and the cone together. For the ice cream I used the stitches from round 9 so that the round 10 stitches sit over the cone slightly and make for a better join.
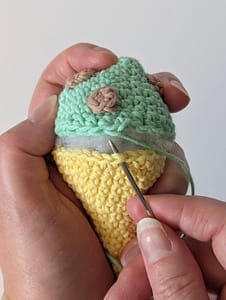
20. Weave in the last end, and enjoy!!
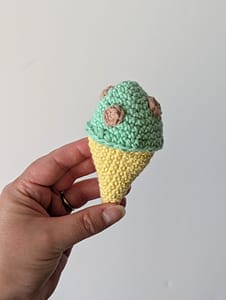
You can make this super cute ice cream in any colors you wish, I’ve also made one with a vanilla ice cream, but use whichever colorways you want and explore which options you prefer the most!
I hope you’ve enjoyed this pattern! Please let me know how you get on with making these – I’d love to know!!